Showing posts with label review. Show all posts

Tuesday, July 24, 2012

Product Spotlight: Senior Albums!

I'm so excited to show off my latest photo product offering for high school seniors! This new album, the Playbook from Finao, is exactly what I have been looking for. The prints are gorgeous, the pages are the perfect thickness and the overall feel of the book is just right. You can choose from a variety of materials for the cover or add your own photos for a truly customized album. I love it!


Friday, July 6, 2012

My Thoughts on the Nikon D800

Thanks to Art Heffron for Instagramming my camera's arrival.
The day Nikon announced it's newest DSLR (the D800) was for sale I placed my order. After a wait of what seemed like forever (about 4 months), I finally got my D800. After using it for the past month to shoot some portraits, products and a few weddings, I have a few things that I'd like to share.

I'm not going to do a huge, in-depth review. Those are easy to find. I just want to mention a few things that I've found through my own experience, both mistakes I've made and pleasant surprises as well. Want to know about those huge files? How about the battery life or the screen? Let me tell you what I think...

First off, is there anything I just don't like? Kind of. You might have heard about the screen having a green tint to it. I can definitely see it and at first it threw me off. I'm actually a little scared to show a client their image on the screen because of the green tint. It's just not that flattering. Fortunately, I've kind of gotten used to it and for some reason I only really notice it in bright sunlight. When I look at my images indoors they seem to look fine. Still, if Nikon fixes it with a firmware update (it's been rumored), I won't complain.

The only other thing that kind of bugged me was that when I first started carrying it over my shoulder, my hip kept hitting the live-view button so I was wasting battery power because the camera was in live-view. Also, when I wanted to shoot I'd look through the viewfinder and not see anything because live-view was turned on. It only happened to me on one or two occasions, so maybe my hip was just extra bony on those days or my belt was in just the right (wrong) place... who knows?

OK, so if that's the worst of it, that's not too bad. How about pleasant surprises? I had a few of those, too! I was concerned when I saw that the battery life was only 900 photos. I figured I'd be changing batteries at least twice at every wedding I shot, which I was not looking forward to. Fortunately, I've been getting over 1600 shots from a battery, which gets me through an entire wedding with about 8% of a charge left!


What else was a pleasant surprise? Well, when I first popped in my 32GB memory card and saw that I was only going to get 400 RAW photos on a card, I quickly started adding up how much it was going to cost me to get enough cards to shoot a wedding (plus have a few backups). Then I did a bit of research into RAW compression and 12-bit vs 14-bit files. When I changed my RAW settings to 12-bit compressed, it said I would get 700 photos from a 32GB card. Much better. But wait... there's more! When I actually started shooting, I was getting closer to 900 images on a card. Apparently, not all images are created equally and contain different amounts of data that can be compressed differently. Now I can shoot a wedding with just two 32GB cards!

So, about those file sizes. Of course you're going to fill up hard drives and memory cards faster. There's not much you can do about that. What I was unprepared for, though, was how long it takes to write those big files to the memory card. On one of the first times I went out and shot with it, I shot a big burst of images. Then I couldn't take any more. The buffer was full and I had to wait for the files to get written to the card. We're talking 15 seconds or so of just waiting. So, I decided to run some tests and figure out what I had to work with.

In my unofficial tests, I found that once the buffer was full (16 RAW photos), it took about 10 seconds to write to a 60x CF card, about 12 seconds to write to a 90x SD card and about 45 seconds to write to a 30x SD card. If you end up shooting bursts of photos it definitely pays to get fast cards. What's more, I'm using the 2nd card slot as a backup. Guess what? If I'm using the 60x CF card and 90x SD card, it takes 22 seconds to write everything to both cards. That's right... your write time takes however long it takes to write to each card individually, but added together!

How has this impacted me? Well, I had my buffer fill up once at a wedding, so I was stuck for a few seconds before I could even take another photo. Fortunately, it was just having some fun with the bride and groom, so nothing that couldn't be put on hold for a second. I've also shot a burst of images and then wanted to change lenses, but had to wait for the camera to shut down until the buffer got dumped. This happens a bit more frequently and is kind of annoying.

Regardless of any minor gripes I might have, the D800 is an amazing camera. Once I got a few things sorted out and learned it's limitations (file write times), I have no complaints. The images are beautiful and the amount of detail captured is just amazing. I'll leave you with a few full-res crops from some of my recent shots. Check out those eyes... Enjoy!


Yes, that's a barn in the background.


Nice sunset, eh?


Wednesday, June 8, 2011

Love the Beast - A Car Movie That's About More Than Cars


Anyone who knows me from high school knows that I'm a car guy. Back then, I drove a variety of classic cars. My first car was a 1966 Dodge Dart. Then I upgraded to a 1968 Ford Galaxy, which had a bigger engine and fewer doors. Finally, I ended up with a 1969 Plymouth Roadrunner, a real muscle car. All of my friends drove similar cars: Mustangs, Novas, Camaros and Corvettes. We were car guys.

In a way I still am. Sure, I don't drive a muscle car. I haven't had grease-stained fingers for years. I can't look at a nut and tell you what size of wrench it takes anymore. Get me near a classic car, though, and I'm suddenly in a different place. The lines of the metal speak to me. The smell of the interior, the exhaust and the garage bring back memories. The chrome and leather and wood of the interior put me back behind the wheel.

When I first heard of this documentary about Eric Bana's car that he's owned since high school I was immediately interested. I mean, he gets the car of his dreams in high school, goes on to become a movie star, yet he still owns the same car he bought in high school? And now he races it? Yeah, it went right into my Netflix queue.

Ultimately, it's a movie about Eric and cars and racing. It documents his history with the car and his relationship with his childhood friends who have always helped him work on the car. It documents his passion for driving and for racing. It culminates with him racing in the same race that first made him fall in love with his particular model of car.

Mixed in with all of the cars and racing are the relationships that have formed over the years. There's Eric's relationship with his friends and his father. There's Eric's relationship with his car. There's his father's relationship with his car. Dr. Phil talks about what's going on here from a psychological point of view. Jay Leno talks about how he's never sold a car that he's owned because of the relationship he has with every single one.

In the end, it's a documentary that's about a lot more than cars and racing. It's about relationships, both with cars and with people. Eric said something that really made an impression on me. He said that the car was he and his friends' campfire. It was something they gathered around while they talked, something that brought them together. I really liked this analogy.

Most car movies aren't really considered sentimental, but I have to admit, I teared up at the end of this one. I don't know why it got to me but it really stirred something inside of me. I'm not inspired like I was after I watched It Might Get Loud, but this movie definitely made me feel. It didn't make me feel like I wanted to go out and drive fast cars (OK, maybe it did just a little bit). Instead, it made me feel something that I've lost, something that I once knew and had forgotten. It also made me feel fortunate for having had the experiences with cars that I've had in the past.

I really enjoyed this documentary. Even if you're not a car person, I'd still recommend it. It's entertaining, funny, touching and has some great guest appearances. It might even touch you in an unexpected way like it did me.

Here's my 1969 Roadrunner.  It was loud, fast and a few different colors.

Here's my 1968 Galaxy.  We measured it once.  It was over 19 feet long... and was only a 2-door.
It's also the first car I ever did burnouts in.

Tuesday, May 24, 2011

Tech Tuesday - Photoflex Heavy Duty Backdrop Kit


When I purchased the Photoflex Heavy Duty Backdrop Kit I wasn't sure how much I'd actually use it in my photography.  I figured I'd pull it out once in a while for a few events, maybe a wedding photobooth here and there, but I didn't think I'd use it very often.  As it turns out, I don't use it at every shoot (that would just be ridiculous), but it does get a fair amount of use.  Plus, just knowing that I have it when I need it is great.

So, let's get down to some details.  I'm not going to give you measurements and all that info (which you can find here), but I will give you a quick rundown of what's included.  You get two large stands (that just happen to double as light stands, which is pretty awesome), a collapsible crossbar and a canvas carrying case that everything fits in.  You can fit a few extras in the case if you'd like.  I keep a few spring clips in there so I always have some for my rolls of seamless paper.

In my experience, this is a very sturdy backdrop stand.  I've had the stands extended up to almost their full height and haven't worried about it's stability.  I've also had very drunk people around it and it hasn't so much as wobbled.  OK, maybe it wobbled a bit when they fell through the paper, but that's kind of extreme example.

It's very easy to set up and tear down.  Granted, it's always easier and faster with two people, but I've done it myself many times.  The collapsible crossbar doesn't restrict you to any particular size of backdrop, so I've used both small and large rolls of seamless as well as any variety of fabric backdrops.  Did I mention that both of the support stands can be used as light stands?  When you purchase this you're basically getting two additional tall, sturdy light stands!

Do I have any complaints?  Of course.  One of the reasons this kit is so sturdy is because of it's footprint.  This is not a system that's made for small spaces!  I usually figure I need an additional 2 feet on each side just for the stands, which means that if I'm using a 107" roll of paper, I need a space that's at least 13' wide!

Really, though, that's about it.  I have mostly praise for this kit.  It's easy to transport, easy to setup (especially with help), versatile and sturdy.  It might cost a bit more than some other kits, but it will last and, if you assume you're getting a few extra light stands when you purchase it, is actually really cheap!

This is the moment before the guy fell through the paper... and the backdrop stands survived!
It also works for smaller groups or individual headshots.
Here's a photo from a few weeks ago that shows the stands almost fully extended.
This piece of equipment was huge!
With a little work and my mad Photoshop skillz we had a product photo.


Tuesday, March 8, 2011

Tech Tuesday - Nikon 85mm f/1.4 AF-S Lens

Wow. Lust-worthy. *Drool*. Right now, words are failing me as I try to describe Nikon's 85mm f/1.4 AF-S lens. I rented it for a photo shoot over the weekend and got to take it out for a day of play in Denver. Here's what happened.

First, let's recap. This is Nikon's newest version of it's legendary 85mm f/1.4 lens, the AF-D. Although I never used the AF-D, I had heard that the AF-S was even more amazing so I couldn't wait to get my hands on it. I rented the lens for a photo shoot on Sunday, which meant it was going to be sitting around all day Saturday. Of course, I couldn't let this happen, so I set up a shoot with fellow photographer Tess Polivka. She rented a Canon lens she had been wanting to try, so we both headed downtown for a day of photography and testing our new toys, I mean lenses.

To really see what this lens could do, I shot the entire day at f/1.4. Normally, I'd hesitate to do this, as most f/1.4 lenses are a little soft when they're wide-open. Not this lens! It's super-sharp at f/1.4. In fact, I was blown away by what I saw when I got home and was able to view the images at full size.

The focus was not only sharp but also accurate! Eyes, not noses, were sharp. At such shallow depth of field, it's very easy to accidentally shift focus from an eye to a nose. I was happy with the number of keepers I had. Not only is focusing accurate, but it's fast and silent also. I'm used to using "D" lenses, which use the body motor to focus the lens. It's a little louder to use, but in most cases it's also faster than the internal "Silent Wave" motors in newer lenses. This lens was indeed silent, but I'm not sure if it could be any faster. Focus seemed almost instantaneous and I never experienced any hunting. Of course, I was outdoors in bright light all day, but that was only Saturday.

On Sunday, I was able to use it at my bridal fashion shoot. Well, I should say I was able to use it a little bit, as I was sharing with fellow Nikon shooter Kimothy Pikor. I think she fell in love with this lens. When I could pry it away from her, though, I was impressed with how it handled in a studio setting. Working with modeling lamps it focused just as quickly and accurately. Working with low light coming in from a window was no different, and I was able to capture some great candid shots without using flash.

So, what's this lens good for and is it worth it? I would never use it for an event, as it's focal length is too long for candid photos but too short for capturing most presentations or ceremonies. I'm not sure how it would work at a wedding, either, as it's still in that too long/too short range. But portraits... this is a dream lens for portraits. It's sharp, it's fast, it has flattering compression, it has amazing bokeh. It's on my wish list. It's in my dreams. It will be mine.

As always, I rent my gear from Pro Photo Rental up in Boulder, CO.

Here are some photos from my two days with this lens.  All were shot at f/1.4, with the exception of the detail photo, which was shot at f/9.


Tuesday, March 1, 2011

Tech Tuesdays - Professional Photographer Magazine


If you've read either of my previous magazine reviews for PDN and Rangefinder, you'll know that I'm a magazine junkie. I just love 'em. In fact, I had to cancel a few subscriptions just so I could read the magazines that I truly loved to read. When I was considering what to keep and what to cut, Professional Photographer Magazine (PPM) barely made the cut.

It's not a bad magazine. Compared to many of the photography magazines you'll find on the newsstand, it's much more pro-oriented. Why then would I consider not renewing my subscription? It's almost too easy to read, especially compared to PDN and Rangefinder, both of which have substantial articles covering a variety of photographic genres. On the other hand, PPM has fairly short articles that don't seem to have quite as much substance to them. It also mainly deals with portraiture and weddings. I've got nothing against portraiture and weddings, as that's pretty much all that I do, but that doesn't mean I don't enjoy reading about something else once in a while.

Another gripe I have with PPM is that, at times, it can seem like one big advertisement for the Professional Photographers of America (PPA). The PPM is a publication of the PPA, so that's no surprise, but it still bugs me. From promoting PPA services and classes to upcoming PPA events, it's easy to go from being intrigued to being turned off.

In the end, I renewed my subscription to PPM. Why? It's a great magazine! It has great articles about running a photography business. It has beautiful pictures, which are always a great source of inspiration. And, as I mentioned, it's pretty easy to read. When I don't feel like diving into a new issue of PDN or Rangefinder, I know that I can always pick up my PPM and just sit back and read. The biggest deciding factor was that it's not available for sale at newsstands. I know that most magazines that I don't subscribe to can easily be purchased if I want a particular issue. With this one, that's not an option.

For $20 a year, I think PPM is a pretty good value. While it might not be my favorite photography magazine around, it's definitely one that I enjoy reading. At the end of the day, there's nothing wrong with reading something you find enjoyable (and hopefully learning something or getting some inspiration while you're at it!).

Tuesday, February 15, 2011

Tech Tuesday - LensPen

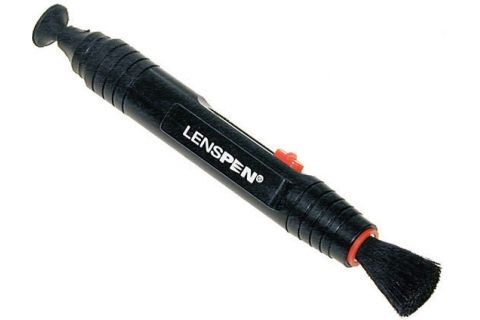
I'm going to keep this one short and sweet.  If you don't have a LensPen in your camera bag, you need to correct that situation and order one today!  A LensPen has two sides.  One side is a retractable brush that can be used to brush off any visible dust on your lens.  The other side has a dry cleaning compound on a soft applicator that you rub on your lens to remove smudges.  Between the two different sides, you should be able to quickly clean up any lens in seconds.

Be aware that anytime you touch your lens, you run a slight risk of damaging it.  If something abrasive (like a grain of sand) is on the lens and you rub it around, you're going to damage your lens.  Regular cleaning cloths, like you might use on a pair of glasses, aren't usually recommended for camera lenses.  That's why it's nice to not only have a brush that can brush away any little specks of dirt, but also a surface that's made to be used on camera lenses.  Apparently NASA even uses LensPens!

OK, enough plugging for LensPen.  Happy Tuesday!

Tuesday, February 8, 2011

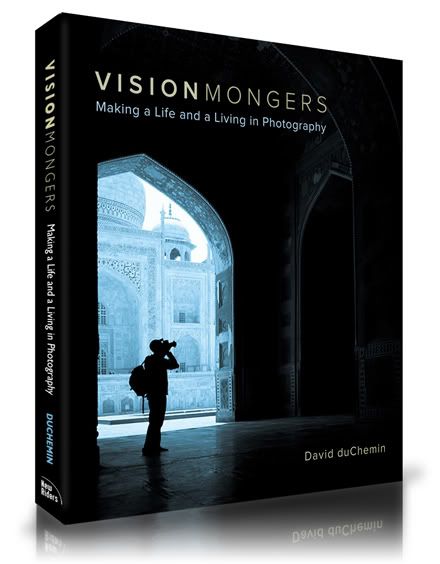
Tech Tuesdays - Book Review - "Vision Mongers: Making A Life And A Living In Photography"

OK, here's the situation... you've got a passion for photography and want to turn it into a career. Or maybe you've already taken the plunge and are working full-time as a photographer, but you're not sure if you're doing things the right way. Or maybe you've been working as a photographer for a while and things are going pretty well, but you still have unanswered questions or nagging doubts in the back of your mind. If any of these sound like you, you need to read this book!

In Vision Mongers: Making A Life And A Living In Photography, author David duChemin tells us his story, and the story of many other successful photographers, in order to make a point. His point is that there is no magic bullet, there is no secret, there is no shortcut to becoming a successful photographer. Instead, he gives us tips and tricks that he has learned through his own journey.

Although this might be considered a textbook of sorts, it doesn't read like one. DuChemin's voice and writing style are easy enough to read for hours on end. Whether he's talking about marketing or pricing, his words are engaging, informative and entertaining.

To me, his words just make sense. There were many different times while I was reading this book that I realized he was saying something that I'd thought or felt before, but had never really taken the time to conceptualize. It felt good to read these things that I'd had a vague notion of in the past, but finally had some affirmation from someone who knows a lot more about photography than me. Of course, it's always nice when someone agrees with you, but this was more than that. This was more like a whisper in my ear saying that I'm on the right track, that I'm headed in the right direction and if I keep moving, I'll keep getting closer to my goals.

Vision Mongers isn't just a feel-good book and it's not just another business book. It's a book written by a photographer for photographers. It's going to be an essential part of my library (and maybe even my business) and I look forward to reading it many more times in the future. If you want to start making money with your photography, do yourself a favor and get this book. There are no guarantees that you'll make it, but reading this book sure can't hurt!

Oh, and by the way, if you've had that Fresh Prince song stuck in your head since the first sentence of this post... you're welcome!

Tuesday, January 25, 2011

Tech Tuesdays - Nikon D7000, Deep Thoughts

A few months ago, I wrote a quick review of Nikon's newest DSLR, the D7000.  Since that post, I've done quite a few (25+) shoots and now feel very familiar with the camera. That means I'm ready to dive in and give a more in depth review. Not everything I have to say is positive (but to be honest, most of it is).

First, I want to confirm that all of my initial impressions were pretty much dead on. It still feels great and sounds awesome. To be honest, when I switch back to my D90, it's so loud and clumsy sounding! It always shocks me. The metering is pretty amazing, giving me very accurate exposures. The autofocus is just fantastic and I still rarely experience any lens hunting, regardless of which lens I'm using or what the lighting conditions are like.

So, what else do I have to add? If you're looking for a full, in-depth technical review, you're in the wrong place. There are plenty of great sites out there for that kind of stuff. Instead, I want to offer some more things that I've experienced with the D7000, both positive and negative. Just to make it easy (because I'm lazy and don't feel like writing more paragraphs), here are my thoughts in list form:

First, the things I'm loving...
- When syncing with studio flash (via Pocket Wizard IIs), I'm able to realistically shoot at up to 1/250 of a second (versus 1/160 on my D90).
- Processing the RAW files is a wonderful experience. There's so much more wiggle room in the exposures. I'm not sure if it's because they're 14-bit RAW files, the sensor or just some great Nikon mojo, but noise takes much longer to become an issue when really pushing exposures.
- Shooting from live view mode is very fast and convenient. Compared to the D90, it's like night and day. It's a very small change that doesn't get used very often, but it is SO appreciated when I do need to use it.
- With a maximum shutter speed of 1/8000 of a second and an ISO of 100, I'm able to shoot at very low apertures in full sun. With some very light cloud cover, I could even shoot at f/1.4 at noon in full sun! This will be so useful this summer.
- Shooting at higher ISOs is great! I have no worries shooting at ISO800. Shots that I took at an event at ISO6400 look great! I don't even hesitate to shoot up there if I need to.
- The viewfinder (and the information that's available in it) is so wonderful! It's big and it's bright. If you ever use manual focus, the focus meter is far superior to everything that came before it.
- I don't know how many times I've been saved by the virtual horizon feature. It rocks!
- Battery life is ridiculous. I think the last time I charged it, it had 750 shots since the last charge and still had a charge of around 50%.
- Video looks great and having a stereo mic jack is such a great addition! (FYI, I'll probably be adding a separate post about shooting video)

Now for a few things that are bugging me...
- The dials for adjusting shooting modes, apertures and shutter speeds are too easy to adjust. I appreciate the fact that they're quieter than the D90, but I keep bumping them and changing my shutter speed or aperture!
- Sometimes my 50mm f/1.4 doesn't "bite" when I first put in on the body and won't autofocus. All it takes is a little wiggle and it works just fine from there on out (it never just stops working), but it was pretty annoying until I figured out what was going on.
- My 55mm f/3.5 AI macro lens will not fit onto the body. I have no idea why this is. It's fit all of my previous Nikon bodies. It should fit, but I haven't felt like forcing it, so when I need a macro shot, I pull out my D90.
- I can't figure out how to format both memory cards at once. I'm sure it's some sort of safety feature that won't allow you to, but it's still annoying.
- The photos look a little bit grainier at all ISOs, but I'm sure I just need to work on my noise-reduction settings in Lightroom. Since everything else I've read claims that this sensor has the lowest noise of any DX format sensor on the market, I'm pretty sure it's me, not the camera.
- Skin tones seems to take on a slightly red/pink hue. It's easy enough to fix, and probably varies slightly from camera to camera, but it's still a little annoying.

So, there you have it. These are my thoughts after a few months of using the Nikon D7000. It's an amazing camera and I have no regrets in buying it (even if it was a little impulsive). Has it improved my photography? Not really. Has it made me any better or landed me any more shoots? No. Does it give me more creative options when I'm shooting? A few. Would I recommend it? Without a doubt. Would I buy it again? In a heartbeat. Do I like it? No. I love it!

Here are a few quick samples for you...

This shot was taken with an ISO of 1600 and has virtually no noise.

This was a "let's see how this works" shot that I took at
ISO6400, just to see what it looked like.
And finally, for window-light portraits, I've had the camera parked at
ISO400 and have loved the results.  Here's a self-portrait I did yesterday.
Of course, most of my clients look much better than I do.  :)

Tuesday, January 4, 2011

Tech Tuesdays - Sekonic L-358 Light Meter

There's a fine line between arrogant and ignorant.  Before I got my Sekonic L-358 light meter, I was arrogant.  After I got it, I realized I was just ignorant.  Let me explain...

I could always figure out the proper exposure for a photo with a little trial and error.  Take a picture, check the LCD and histogram, adjust the camera settings, repeat as necessary.  I typically had a good exposure within 3 shots and 10 seconds.  Why would I need a light meter for that?  Well, that was when I was shooting outdoors and had one source of light.  Once I moved into the studio, I started setting up shots with more than one light.  I started dealing with lighting ratios.  Once you start shooting with 3 or 4 lights, you can forget about an easy trial and error approach to lighting.  It's possible, but why bother when you can pick up a light meter and save yourself the headache?

When I first got my Sekonic, I wasn't sure how much I'd actually use it.  I found a good deal and jumped on it, figuring I'd need it sooner or later.  Little did I realize how soon "sooner" would be.  After using it at a few shoots, I knew I'd purchased a very valuable piece of equipment that wouldn't be leaving my camera bag.

Monday, December 27, 2010

Year End Review - CRAVE Denver Shoots

It all started with a post I saw on the Mile High Photographers' forum that said CRAVE Denver was looking for photographers to photograph local, women-owned businesses. After a bit of quick research, I liked what I had to read about CRAVE and sent off an email saying that I was interested in helping with the photography. Three months and 16 shoots later, I've worked with some amazing women, visited some awesome businesses that I never knew existed and expanded my network by leaps and bounds. Here are the wonderful women whom I've had the opportunity to work with and the Denver-area businesses that they own:


Tuesday, November 23, 2010

Tech Tuesdays - ProDPI

It was a cold, rainy night. I was going to an event down in Englewood. My brother was in town from Boston and was borrowing my truck, so he dropped me off at the event. Unfortunately, due to our schedules not quite meshing, I was about 45 minutes early to the event. Since the weather was kind of miserable, I didn't really feel like hanging around outside, so I asked if I could come inside and wait. The answer was a friendly "Yes", and that was my first contact with ProDPI.

I was shown back to the area where the party was going to take place. One of the customer service reps was just leaving and she told me that I could sit at her desk if I wanted. How nice of her! After sitting for a while, a woman came into the room with her young boy. It turns out she was Caitlin, the CEO of ProDPI. We chatted while she fed her son and I couldn't have asked for a nicer person to talk to while I waited. I learned that the guy who I met when I walked in was Jeffrey, her husband and COO of ProDPI.

When Caitlin had to run off to take care of something, I took the opportunity to look around at the samples or their work that they had on display for the party. I should mention that ProDPI is a full service, pro lab. They offer everything from prints to albums, business cards to stickers. Every sample that I looked at, including albums, accordion books and mounted prints all looked amazing!

Once the party was underway and more people showed up, Jeffrey took us on a tour of the ProDPI facilities. He explained their print process, their philosophy and why they relocated from California to Colorado. He showed us their lab, their prep area and their packing facilities. Their commitment to being a green company shows in their use of shipping materials (cardboard made with post consumer waste), recycling of all recyclable materials, eco-friendly print packaging options and electronic invoicing. By the end of the tour I was thoroughly impressed.

The next day I decided to create an account with ProDPI and order some test prints. No matter how impressive a lab is in person, it doesn't mean much if their actual prints aren't any good. I downloaded their ROES software and, after a few minutes, had ordered my prints. I really wanted to get the prints ordered before noon, as I had another test for ProDPI. I wanted to see if I ordered my prints before noon if they'd be at my house the next day. I'm happy to say that they were waiting for me when I came home the next evening! I know this might not happen every time, but just knowing that it can happen is awesome.

So, let's do a quick recap. Friendly staff, family-owned, great quality press products, good selection, eco-friendly and fast! Sounds good so far, but what about those prints? I'm happy to say that they are better than I had expected! The actual quality of the print is outstanding. I have a standard test image that I print with every lab I've ever tried and ProDPI is at the top of the list. Their print showed more detail than most and the colors were excellent! What really makes their prints stand out, though, is their paper. Jeffrey mentioned that they are one of the few labs in the country who use Fuji paper and I must admit, I like it a lot better than the Kodak paper that I'm used to. It's a little heavier, so it feels more substantial, and it has a more appealing texture as well.

In case you didn't figure it out by now, I now have a new lab. ProDPI does amazing work and I'd suggest checking them out if you're a photographer. Not only are they awesome for all of the reasons I mentioned above, but their prices are very competitive with other national pro labs. If you're in Denver, they are a local business and I'll take almost any opportunity to support local businesses. Welcome to Colorado, ProDPI. I'm glad we met!

Tuesday, November 16, 2010

Tech Tuesdays - First Look: Nikon D7000

There are some products that, once they're introduced, rewrite the rules for an entire industry. If you believe the hype, Nikon's new D7000 DSLR might just be one such product. It's been favorably compared to cameras that cost anywhere from twice as much to 4 times as much. No one can keep it in stock and rumors a swirling that, unless you have had one on preorder for a while, it will be months before you can get one.

Imagine my surprise when I decided to dig around a little and found one in my area that was available for sale! Honestly, I believe it was probably the only one available (at retail prices, at least) in the state of Colorado. Someone had a D7000 on hold but hadn't come in to pick it up, so the salesperson took that person's name off of it and put mine on it. I had until the close of business that day to pick it up. I didn't wait.

I got it, brought it home, charged the battery, read the manual, did some research and started playing around with it. So far I've only had a chance to do one shoot with it, but many more are on the horizon. What follows are my first impressions. I'll be sure to follow up with a more in-depth review in the near future.

Note: All comparisons are made to a Nikon D90.

Feel - The first thing I noticed about this camera was the feel of the body. I'm talking about the actual texture of the surface. It feels a bit more sticky, more grippy. I never really felt like I was going to drop my D90, but this camera really feels secure in my hands.

Look - It doesn't really look much different from my D90. There are a few more buttons and an extra dial for the shutter control. The menus and displays all look pretty much the same. Once I had it set up the way I like, it took about, oh, 2 seconds to feel comfortable with it.

Sound - This camera sounds awesome. Or should I say it doesn't sound awesome? It's quiet! The shutter sounds so fast, tight and slightly muffled, I think I'm in love. When you switch it to quiet mode, the shutter just makes the tiniest bit of noise. The first time I tried it I had to make sure I was using it right it was so quiet!

Other thoughts: With just one shoot to go on, I have to say that I'm very impressed.
- Having dual memory card slots was pretty sweet.
- Reviewing photos is a fast and easy experience, as you can scroll up/down, left/right and diagonally, and you can do it quickly!
- Exposures seemed to be dead on when shooting in manual mode and spot metering.
- Focus was pretty good, although I did have a few soft images. I'm going to blame it on the move from a 9-point to a 39-point focusing system. I think I might not be used to such a small focus point, so I was a little careless about being precise with my focus. Regardless, focusing was fast and I don't think I experienced any lens "hunting" in almost 3 hours of shooting with my 50mm f/1.4 AF-D and 135mm f/2 AF DC lenses.
- Did I mention how great this camera sounds?

I haven't really had a chance to test out the D7000's performance at higher ISOs, but everything I've read so far makes me think I'm in for a treat. I also plan on shooting quite a bit of video with it in the next few months. I can't wait to try out the autofocus while shooting some video!

One thing to mention is that in order to process the RAW files, I had to download Adobe Photoshop Lightroom 3.3 RC1. So far I haven't had any issues with it. If you're not running Lightroom and need to process your D7000 RAW files, a quick search should point you in the right direction.

Now, if you'll excuse me, I've got a new camera that's just begging me to use it.

Tuesday, November 9, 2010

Tech Tuesdays - Lowepro Exchange Messenger Bag

After working a few events where I needed to swap lenses often, I knew something had to change. Here's the situation: You're at an event, you plan on using 3 lenses, your bag is stored someplace that's inaccessible during the event and you're wearing slacks. What do you do? Sounds like you need a bag that's a lot smaller than your camera bag but still holds enough that you don't have to worry about not having something.

When faced with this situation, my first thought was to get a Shootsac. I saw Jasmine Star using one of these while working a wedding and thought it looked like the perfect solution. Unfortunately, I needed one on short notice and couldn't find anyone here in Denver who sold them. Thus began my quest for the non-intrusive-yet-highly-functional bag.

Tuesday, November 2, 2010

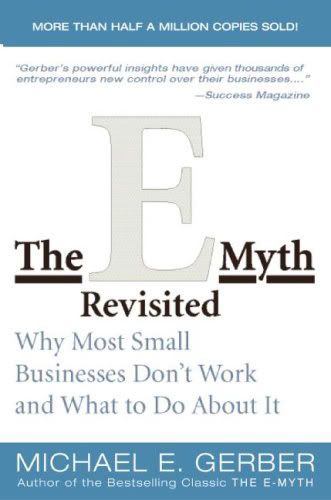
Tech Tuesdays - Book Review - "The E-Myth Revisited"

I had heard great things about Michael Gerber's book The E-Myth. Great things like "I stayed up all night reading it". Successful, young photographers like Chase Jarvis and Jasmine Star have endorsed it. So, I figured I'd give it a shot, but instead of reading the original version (which is from the 1980s), I decided to read The E-Myth Revisited, since it's supposed to be a "new and totally revised edition". Should be the same ideas but with more computers and less fax machines.

For some reason, I just could not get into the book. Usually, this is a bad sign. If I'm not into a book within the first 10-15 pages, I usually just cut my losses and move on, but with this book, I was determined to read it and see what the fuss was all about. As I read on, I started to get into it, which is why I can actually write a review. You didn't think I'd post a review of the first 15 pages that just said "boring", now did you?

The way the book is written is fairly unique for a business book. As you'd expect, the author discusses his techniques, methods and ideas, but each chapter is framed within a conversation with an exasperated business owner. The author meets a woman who bakes pies and just can't figure out why she's working so much and not growing her business. Their conversation carries you through the ideas the book presents and gives them a practical application so you, as the reader, get to see the concepts applied to an actual business instead of just discussed as hypothetical concepts. It's a clever concept that not only helped me to get an idea of what was being discussed, but also broke up the monotony of just reading a business book.

So what about the content of the book? I have to admit, I didn't find The E-Myth Revisited as groundbreaking as I'd hoped. There were times where I was very inspired by what I was reading. The ideas all seem sound and seem like they can be applied to any business. I'm not sure what was missing for me. Maybe it's that I don't feel ready to make the major changes suggested by the book. Maybe it's because there weren't many ideas I could immediately apply to my business. I can't quite put my finger on it. Something tells me that if I go back and read it again in a year, I'll be much more excited. Maybe I'll even stay up all night reading it!

Tuesday, October 19, 2010

Tech Tuesdays - Photodex ProShow Gold

Photodex ProShow Gold is one of the fastest, easiest and least expensive ways around to make original video slideshows with your photos. With so many photographers producing video slideshows of their work, this program gives you a chance to customize your video and make it really stand out from the crowd.

When I started searching for a product that I could use to produce videos, it didn't seem like there were many options out there. Sure, there are plenty of programs for editing video, but that's not really what I needed. To make a photo slideshow, I don't need a video editor like Final Cut Pro. I need something that's simpler, easier to use and definitely cheaper!

There are services popping up that are geared specifically towards photographers such as Animoto. These are great, as you choose a song, choose a style, upload your photos and let Animoto do the rest. My main issue with Animoto videos is that, well, they all tend to look the same. I think it's a great service and anyone who hasn't seen an Animoto video before is sure to be impressed, but when I see a video portfolio with a bunch of Animoto videos in it, I pretty much know exactly what to expect from each video.

I'm not trying to bash Animoto, just give the reasons why I didn't want to go with it to produce my videos. So, why did I choose ProShow Gold? There are a few reasons. It's a program that you purchase, not a subscription service, which means that once it's paid for, I can produce videos for the next 20 years without spending any more money. It's really easy to learn and use, which is important when you don't have a lot of free time. I also have full control over the videos I produce with the ability to make them as plain or creative as I want.

With that being said, if I make a boring video, that's entirely my fault as well. Fortunately, ProShow Gold comes with a number of templates that animate individual slides or entire slideshows. It's also easy to make various movements (pans, scrolls and rotations) on individual slides. It also comes with a variety of slide transitions. It's able to incorporate video along with photos, and adding a soundtrack is as easy as dragging and dropping an mp3 file.

There's another, more expensive version of ProShow called Producer. It comes with more slide animations and show options. It also is geared more towards commercial use. I didn't think that I needed everything it had to offer and was happy to hear that most of the animations are available for purchase without upgrading. If you do choose to upgrade and you already own ProShow Gold, you receive a discount on Producer. So far I haven't felt the need, but it's nice to know the option is available.

I'm very happy with ProShow Gold. I haven't made as many videos as I'd like to make, but then again I haven't had much free time. Maybe if I had Animoto and could just upload photos and let them do the rest I would make videos more often. If you think that might be the case with you, Animoto might be worth a look. For now, I'll just keep taking photos and then when things slow down a bit I'll get to dive in and go video crazy!

I just made the video at the top of this post this morning. I timed it to see how long it actually takes to make a quick video. I had the images and music picked out before I started. From opening the program to exporting the video to my hard drive, it took about 22 minutes to make this video. Of course, I could have spent more time playing with slide effects, modifying the slide motion and even synching the transitions to the music, but that would have taken a bit longer. I also could have just dragged the photos to the timeline, stuck with the default transitions and had no slide motion and been done in 5 minutes. As it is, I think I found a nice middle-of-the-road solution that gave a nice video that isn't too over the top but isn't too boring either. What do you think?

Tuesday, September 21, 2010

Tech Tuesdays - Hama Lens Hood

I had been looking for a good Gegenlichtblende for my 50mm f/1.4 for quite a while. Oh, sorry. Don't speak German? Neither do I, but that's what my Hama lens hood is called on the packaging.

So, as I was saying, I had been looking for a lens hood for my 50mm lens for a while. Although I love some good lens flare, there are times you just want to keep the sun off of the lens. Considering this is the lens I use the most and I’m usually shooting outdoors in natural light, a hood would be a good thing to have.

Imagine my surprise when I walk into a camera shop in Victoria, British Columbia of all places and find a whole rack of lens hoods! The shop, Lens and Shutter, had all kinds of goodies, but most were just a little to expensive considering the exchange rate. The Hama hood was only $15, so I figured I’d go for it.

The hood screws into your lens’ filter thread, so you don’t have to worry about compatibility between lens brands. It’s got a collapsible rubber hood that acts as a bumper for your lens when extended or collapsed and takes up very little space when collapsed. I think it’s a brilliant design!

The big question is: Does it work? So far it does! I’ve found situations where the lens might have been hit by some sun without the hood, but with the hood there’s no light on the lens, giving me better color, contrast and saturation. Of course, lens hoods don’t work miracles and I’ve still got to be careful when I’m shooting into the sun or when the sun is right out of frame.

I’ve also found that the hood doesn’t show up in the photos. The packaging says it can be used for lenses with a focal length of 45-55mm, so my 50mm is right in that range. It’s also got an filter ring built in, so it’s still able to accept filters or lens caps.

I don’t think my Hama lens hood has left my lens since I purchased it. At $15, it’s one of the best deals around. It protects my lens, it shields it from glare and it takes up very little room. Once I got home and did a little research, I found out I got a great deal as well. B&H sells their Hama lens hoods for $25 each. I almost saved enough money to pay for an extra meal in Victoria! Almost.

Tuesday, September 14, 2010

Tech Tuesdays - Lastolite TriFlip Bottletop Covers

If you remember reading my post about the Lastolite Tri-Grip, you'll know that I love it. I almost always have it with me. It's awesome for diffusing direct sunlight, providing a large, diffused light source that bathes your subject in a pool of glowing light.

So, what happens when you need a little reflected light instead of diffused light? You buy a reflector. When you go shopping for a reflector, you'll have to decide if you want white, silver, gold, white/silver, gold/silver or black (not really a reflector of light, but still a reflector). That's a lot of options and their cost adds up quickly. What if I told you you could grab them all for the cost of one? Then what if I told you that you you could pick up a set of covers that slips over your beloved Latolite Tri-Grip so you could use it as a reflector? Interested? I bet you are!

Lastolite makes a product called the TriFlip Bottletop Covers. It's a set of two reversible sleeves that fit a TriGrip perfectly. They include all 6 colors I mentioned above (two colors are included twice since there are 8 sides). It's such a simple idea it's kind of ridiculous. Just slightly collapse your Tri-Grip, slide it inside the cover, pop it open and you've got a double-sided reflector instead of a diffuser!

If you're considering purchasing a set of these, let me clear something up. If you look at any description of the TriFlip Bottletop Covers, it says that they fit "regular size (original 33" version) Tri Grips". If you look at the descriptions for Tri-Grip diffusers, you'll see that some say 33" and some say 32", but if you look at the tag that came with your Tri-Grip, it will say 30". Don't worry. For whatever reason, they all seem to be the same thing and the Bottletop Covers will fit. I'm not sure why there is so much inconsistency with the sizing, but they all appear to be the same size in reality.

So the big question is, "How do they work?". One word: Awesome. These things are so amazing! They're very easy to use. They slip on in about 10 seconds. They're very secure and tight. You get all of the benefits of using the Tri-Grip. You have 6 different reflectors at your fingertips (not to mention the diffuser). The best part? The hardly take up any space at all! If you were to carry around 6 different reflectors (especially Tri-Grips), it would take up a lot of room and weight quite a bit! With these, I can actually zip the diffuser and the covers inside the laptop compartment on my backpack and not even notice they are there!

If you've got a Lastolite Tri-Grip diffuser, there is no reason not to pick up a set of the TriFlip Bottletop Covers. They add so much versatility to an already useful tool, it's almost unfair. Now my only problem is that I want to buy another Tri-Grip so I can use both covers at the same time!

Tuesday, September 7, 2010

Tech Tuesdays - Wacom Tablet

Has there ever been something that you've heard everyone talk about, that you've heard nothing but good things about, but for some reason you just don't think you'll like that much? For me, that something was a Wacom Tablet. Everyone says that once you use one to edit photos, you'll never edit without one again. I'd heard that they were so much better than using a mouse. I believed everything I heard, but I didn't think that there was anything wrong with the way I was doing things.

The strange thing about my hesitance towards converting to a Wacom Tablet is that you use a "pen" to work with. It's so much easier to use than a mouse. It's just as natural as using a pen... and I collect pens! I collect fountain pens. For a while, I was completely addicted to improving my handwriting. I practiced every day. I got callouses on my fingers. I had ink stained hands. My collection of pens grew to almost 200. Yet I didn't want to convert my worflow to the use of a pen? Seriously!?

Everything changed once I shot my first wedding. When I was looking at so many photos to retouch, the thought of using a mouse just made my wrist hurt. Plus, Belinda was out of town and I have a reputation for buying things when she's out of town. So, I broke down, did a little research and decided to go with the Wacom Intuos4 Small Tablet. Now I have to say, like everyone else said, since I've used a tablet to edit photos I wouldn't use anything else.

The tablet itself is about the size of a piece of copier paper. The actual surface that you use is much smaller. There are keys and a dial that can be customized to perform just about any action you'd like. The pen has a few switches on the barrel and an "eraser" on the end. Again, these can all be customized to perform any function you'd like them to.

Since I use the tablet for editing photos and nothing else, I haven't had a chance to use all of the cool features it has. It can detect the angle of your pen, so if you're using a chiseled tip brush, it will affect the look of your brush stroke. It's pressure sensitive, so by pressing harder or lighter you can control the flow of your edit. But, I haven't used those, so I can't comment on them. Apparently they're awesome.

One of the first things that threw me for a loop was the fact that the location of the pen on the tablet maps directly to the screen. With a mouse, if I needed to move the mouse across the screen, I might make two small movements with my hand, picking up the mouse between movements, so that the mouse never left a small portion of the mouse pad. With the pen and tablet, the left side of the tablet is the left side of the screen and the right side of the tablet is the right side of the screen. This means that when you want to move from the left to the right side of the screen, the pen has to travel that distance on the tablet. Two short movements doesn't do it!

Once I figured that out, using it quickly became second-nature. I found I had a lot more control when using brushes and editing small things. My wrist didn't get sore after hours of use (although my fingers did get a little tired, like I was writing a long letter). I can imagine, in this digital age, if you can't remember the last time you physicaly used a pen to write anything longer than a signature at the bottom of your Starbucks receipt, it might take a while for your fingers to get used to using the pen.

Another great thing about the tablet is it's very portable. It's currently in my laptop bag, next to my laptop, and doesn't take up any more room than a magazine. I was just using it earlier today to do some editing while I was away from home. Wacom even includes two USB cords so you can keep one at home and take one on the road!

If you've heard the hype before, I'll just say it again. If you've never given a tablet much thought, listen up. Once you use a Wacom Tablet to edit your photos, you will never want to use a mouse again! Now, if only I could cram the guts of the Wacom pen into one of my fountain pens, I'd be a happy camper.

 A quick note on the photo at the top of this post: I thought I had gotten all of the dust off of the tablet.  Apparently I didn't.

Tuesday, August 31, 2010

Tech Tuesdays - Dell Studio XPS 1645 Laptop

Down time is a bad thing, at least from a business standpoint. The less time you have to be productive, the less time you have to be profitable. Before I got a laptop, when Belinda would go to a coffee shop to work and I’d go with her, I’d end up reading my photography magazines. That’s not a bad thing, as I’ve always got plenty that need reading. But that’s not necessarily the best use of my time, especially when I have photos to edit.

The more I thought about it, the more it made sense. I needed a laptop. Then, it was a question of what specs do I need? It came down to a big screen, a powerful processor and a long-lasting battery. I needed something that I could use to edit photos and possibly create short videos. I needed a desktop replacement.

I never thought I’d want a desktop replacement for a laptop. It kind of defeats the function of a laptop if you can’t use it on your lap, doesn’t it? Not really. In today’s age of the coffee shop, a laptop is just a portable computer. A laptop is something you can take with you and work on while you sip a latte. It’s something you can pull out at the airport and catch up on a little work while you wait for an airplane. It’s something that you can use in a hotel room to work while on the road. And when you think about it, all of these places now have work surfaces and even accessible power outlets because laptops have become ubiquitous. No laps required!

Back in my computer geek days, I knew that the XPS line of Dell computers was something that power-users used. So, that’s what I got: a Dell Studio XPS. When I placed my order for my laptop, I knew that I wasn’t going to be getting an ultra-portable laptop. This thing is no netbook. It’s heavy. It’s big. It’s got a bulky battery. But you know what? When it showed up, it wasn’t nearly as big as I was expecting. It’s actually kind of sleek. It’s a good looking piece of technology. Sure, it’s heavy, but it’s also powerful, and that’s a tradeoff that you have to accept.

This laptop is much more powerful than my desktop computer. It’s got a newer processor that has more cores. It’s got more RAM. It’s got the same resolution screen (1080p). It’s got a full-sized, backlit keyboard. It’s pretty darn nice. When I can, I try to use it instead of my desktop to edit photos because it’s faster. There’s less down time. And remember, down time is a bad thing.

So, any negatives? I’ve found a few. Again, it’s big and heavy. When it was time to look for a camera bag that could hold my laptop, I was limited because of the size of the laptop. I even found that my laptop bag options were limited. And talk about heavy… Belinda won’t even lift my camera bag when I have my camera gear and laptop in it at the same time.

What else? For some reason, the keyboard has a strange stutter and random keys will type two letters in a row while I’m typing. The screen is pretty glossy, which can be pretty distracting when there’s a bright light behind me. The processor can get pretty hot while I’m editing photos, which makes the computer hot to the touch and uncomfortable to work on.

In the end, I’m quite happy with my laptop. It does everything I need it to do. It’s fast. The battery is awesome. The screen is beautiful. It’s red and shiny. Now I can be productive anywhere I want, just as long as I can find a table and a power outlet.

Oh, and sorry for the recycled photo. That's just the way things are going today. :)