Showing posts with label gear. Show all posts

Friday, July 6, 2012

My Thoughts on the Nikon D800

Thanks to Art Heffron for Instagramming my camera's arrival.
The day Nikon announced it's newest DSLR (the D800) was for sale I placed my order. After a wait of what seemed like forever (about 4 months), I finally got my D800. After using it for the past month to shoot some portraits, products and a few weddings, I have a few things that I'd like to share.

I'm not going to do a huge, in-depth review. Those are easy to find. I just want to mention a few things that I've found through my own experience, both mistakes I've made and pleasant surprises as well. Want to know about those huge files? How about the battery life or the screen? Let me tell you what I think...

First off, is there anything I just don't like? Kind of. You might have heard about the screen having a green tint to it. I can definitely see it and at first it threw me off. I'm actually a little scared to show a client their image on the screen because of the green tint. It's just not that flattering. Fortunately, I've kind of gotten used to it and for some reason I only really notice it in bright sunlight. When I look at my images indoors they seem to look fine. Still, if Nikon fixes it with a firmware update (it's been rumored), I won't complain.

The only other thing that kind of bugged me was that when I first started carrying it over my shoulder, my hip kept hitting the live-view button so I was wasting battery power because the camera was in live-view. Also, when I wanted to shoot I'd look through the viewfinder and not see anything because live-view was turned on. It only happened to me on one or two occasions, so maybe my hip was just extra bony on those days or my belt was in just the right (wrong) place... who knows?

OK, so if that's the worst of it, that's not too bad. How about pleasant surprises? I had a few of those, too! I was concerned when I saw that the battery life was only 900 photos. I figured I'd be changing batteries at least twice at every wedding I shot, which I was not looking forward to. Fortunately, I've been getting over 1600 shots from a battery, which gets me through an entire wedding with about 8% of a charge left!


What else was a pleasant surprise? Well, when I first popped in my 32GB memory card and saw that I was only going to get 400 RAW photos on a card, I quickly started adding up how much it was going to cost me to get enough cards to shoot a wedding (plus have a few backups). Then I did a bit of research into RAW compression and 12-bit vs 14-bit files. When I changed my RAW settings to 12-bit compressed, it said I would get 700 photos from a 32GB card. Much better. But wait... there's more! When I actually started shooting, I was getting closer to 900 images on a card. Apparently, not all images are created equally and contain different amounts of data that can be compressed differently. Now I can shoot a wedding with just two 32GB cards!

So, about those file sizes. Of course you're going to fill up hard drives and memory cards faster. There's not much you can do about that. What I was unprepared for, though, was how long it takes to write those big files to the memory card. On one of the first times I went out and shot with it, I shot a big burst of images. Then I couldn't take any more. The buffer was full and I had to wait for the files to get written to the card. We're talking 15 seconds or so of just waiting. So, I decided to run some tests and figure out what I had to work with.

In my unofficial tests, I found that once the buffer was full (16 RAW photos), it took about 10 seconds to write to a 60x CF card, about 12 seconds to write to a 90x SD card and about 45 seconds to write to a 30x SD card. If you end up shooting bursts of photos it definitely pays to get fast cards. What's more, I'm using the 2nd card slot as a backup. Guess what? If I'm using the 60x CF card and 90x SD card, it takes 22 seconds to write everything to both cards. That's right... your write time takes however long it takes to write to each card individually, but added together!

How has this impacted me? Well, I had my buffer fill up once at a wedding, so I was stuck for a few seconds before I could even take another photo. Fortunately, it was just having some fun with the bride and groom, so nothing that couldn't be put on hold for a second. I've also shot a burst of images and then wanted to change lenses, but had to wait for the camera to shut down until the buffer got dumped. This happens a bit more frequently and is kind of annoying.

Regardless of any minor gripes I might have, the D800 is an amazing camera. Once I got a few things sorted out and learned it's limitations (file write times), I have no complaints. The images are beautiful and the amount of detail captured is just amazing. I'll leave you with a few full-res crops from some of my recent shots. Check out those eyes... Enjoy!


Yes, that's a barn in the background.


Nice sunset, eh?


Tuesday, February 21, 2012

The Polaroid Diaries: Part I - Introduction

Over the past many months, I've been shooting with a variety of Polaroids and films. I've gotten some really good results and some really bad results. Good news: Polaroids rock. Bad news: Polaroid film isn't cheap. I'd much rather get more good results than bad results and I'm sure you would too. So, I'm going to try to document some of my experiences here so we can both learn something.

I'm going to start out with some initial thoughts and then get a little more detailed in the future. Here are the cameras I've been shooting with:
  • SX-70
  • 635 CL
  • 360 and 230 Packfilm Cameras
And the films I've been using:
  • Various Impossible Project films (PX 100 Silver Shade UV+, PX 70 Color Shade, PX 70 Push)
  • Fuji 100C, 100B and 3000B 
  • Polaroid Chocolate and Sepia Type 100 (expired)
  • Polaroid 600 (expired)
  • Polaroid 779 (expired)
If you're just getting started with the wonderful world of Polaroid, here are a few tips for you:

- Be ready to spend a bunch of money. No kidding. It's not cheap to buy film. If you're shooting a SX-70 or a 600 camera, be ready to spend anywhere from $2-$3 every time you push the button. The packfilm cameras are cheaper at about $1 per image.
- Be prepared for some disappointing results. Not every photo is going to pop out looking like it's straight out of the 1970s. You're going to get over exposed photos, under exposed photos and blurry photos. For quite a while, you'll get them more often than you get properly exposed and properly focused photos, and that's a promise.
- If you're buying cameras at yard sales, antique shops or Craigslist, be prepared to get some that don't work properly. Also, be prepared to waste some film figuring out that your camera doesn't work. And then there's the camera that you thought worked, but then decides not to work very well when you really want to use it. Seriously.

Fortunately, it's not all doom and gloom in the wold of Polaroid. You can get some great results with a little knowledge and practice! It's also a lot of fun and very addictive. 

If you've already got a Polaroid and want to get better photos, we're in this journey together. I'll offer up any tips I know or find out and hope that you'll do the same. Let's help each other. If you're just thinking about getting into Polaroids, maybe this will help you figure out if it's really something you want to mess with or if it's something you can be passionate about and master.

Here's a few images to close things out. You can be sure that you'll be seeing them again in some future blog posts. Also, if you want to stay current on all of my film shooting and personal work, head on over to my Tumblr page.

Fuji 100-C

Polaroid 779

Fuji 100-B

Polaroid Chocolate

Impossible Project Silver Shade UV+

Impossible Project Color Shade


Tuesday, July 12, 2011

Tech Tuesday - Polaroid 230


I am a technology junkie.  I'll admit it.  When I see a new gadget or gizmo that can do something I've never seen before, I'm usually impressed.  What's even more impressive is to see something you've never seen before from a camera that's 40 years old.

My first experience with a Polaroid camera that used pack film was while I was assisting Rachael Grace Photography while she photographed a wedding. Rachael does wedding photography a little differently. In addition to digital, she uses lots of film, including Polaroid pack film.

I had never seen or used Polaroid pack film. My previous experience with Polaroids was limited to my SX-70. I still haven't gotten stellar results from it (although that is kind of the point, I suppose), so my hopes for her Polaroid 420 were not high.

The way pack film works, you take a photo which exposes the film. You then pull the film through some rollers, which spreads a developer over the film. You wait a few minutes, peel off the photo from the exposed film and you have a photo.

When she shot her first photo, she handed it to me to time and then peel. After 2 minutes, I peeled the photo away from the paper with tempered expectations. What I saw when I peeled away that photo just amazed me! It had color and lots of it! The colors were correct! It was actually a good photo!

I knew I had to get one for myself, so I came straight home, tracked one down and before long I was taking photos with my own Polaroid pack film camera. There was a bit of an experimental period and a learning curve. Some photos came out very dark while others came out looking great. Eventually, though, I got it right (or at least pretty close).

I can't wait to start using this camera with some of my clients. It's not entirely predictable and isn't perfect, but that's part of what makes it so fun to use. If you've got one of these and are interested in learning more about the camera, keep an eye out for a follow up blog post where I'll go over a few tricks I've learned that helped me get better photos.

This was taken in full sun in downtown Denver.

Even in the shade with a longer exposure you can get good results.

This was taken with my new Polaroid 350 with a close-up lens attachment.  

Tuesday, March 15, 2011

Tech Tuesday - Quick Review: Polaroid SX-70


The Polaroid SX-70 is one of Polaroids more famous cameras.  If you can believe it, it's actually an SLR.  Yes, it's a folding, single-lensed, instant-film SLR.  I've only had mine for a few weeks and in that time have only gotten a few good images with it, so I'm going to hold off on passing judgement and doing a full review until I've spent a little more time getting used to it and really learning how to use it.  For now, I'll just give you my first impressions.

I had been wanting to add a Polaroid to my camera arsenal for a while.  After a little research, the SX-70 sounded like the right camera for me.  Why?  Unlike most Polaroids, it's an SLR, so you get more control over your images.  It also folds up so it's about the size of a VHS tape (a VH...what?), which is pretty awesome.  Not quite pocket-sized, but definitely easy to carry around.

In working condition, these things fetch a pretty penny on eBay, so I decided to try my luck at some antique shops around town.  Actually, I went back to an antique shop where I saw a Rollieflex TLR for sale that I'm still kicking myself for not buying.  When I got there, the Rollie was gone, but I came across this beauty.  It said it worked, so I bought it for a great price.  That same day I ordered my film from The Impossible Project and waited for it to arrive.

The day my film arrived I just couldn't wait to use it, so I popped in a film pack (and the dark slide ejected, which was a good sign), aimed at the nearest object, focused, pressed the big red button and... nothing.  Finally, the photo popped out and it was blank.  I figured it was just bad beginners luck, so I shot another.  This time it felt like the mirror got stuck, which made me panic a little.  It turns out it was just too dark in my house and it was doing like a 10-second exposure.

After putting the camera down and doing a little research (this film wants lots of light), I was able to start getting good exposures and decent photos.  The film is still a little tricky to work with, so I'm definitely in the learning stages, but I see good things in my future with this Polaroid.  I'll keep you updated with my results and will hopefully be able to write a full review sometime in the future.  Also, expect reviews of the different Impossible Project films.

If you want to find out a little more about this camera, here's a great video that Polaroid put out in 1972 to explain how it works:


Tuesday, March 8, 2011

Tech Tuesday - Nikon 85mm f/1.4 AF-S Lens

Wow. Lust-worthy. *Drool*. Right now, words are failing me as I try to describe Nikon's 85mm f/1.4 AF-S lens. I rented it for a photo shoot over the weekend and got to take it out for a day of play in Denver. Here's what happened.

First, let's recap. This is Nikon's newest version of it's legendary 85mm f/1.4 lens, the AF-D. Although I never used the AF-D, I had heard that the AF-S was even more amazing so I couldn't wait to get my hands on it. I rented the lens for a photo shoot on Sunday, which meant it was going to be sitting around all day Saturday. Of course, I couldn't let this happen, so I set up a shoot with fellow photographer Tess Polivka. She rented a Canon lens she had been wanting to try, so we both headed downtown for a day of photography and testing our new toys, I mean lenses.

To really see what this lens could do, I shot the entire day at f/1.4. Normally, I'd hesitate to do this, as most f/1.4 lenses are a little soft when they're wide-open. Not this lens! It's super-sharp at f/1.4. In fact, I was blown away by what I saw when I got home and was able to view the images at full size.

The focus was not only sharp but also accurate! Eyes, not noses, were sharp. At such shallow depth of field, it's very easy to accidentally shift focus from an eye to a nose. I was happy with the number of keepers I had. Not only is focusing accurate, but it's fast and silent also. I'm used to using "D" lenses, which use the body motor to focus the lens. It's a little louder to use, but in most cases it's also faster than the internal "Silent Wave" motors in newer lenses. This lens was indeed silent, but I'm not sure if it could be any faster. Focus seemed almost instantaneous and I never experienced any hunting. Of course, I was outdoors in bright light all day, but that was only Saturday.

On Sunday, I was able to use it at my bridal fashion shoot. Well, I should say I was able to use it a little bit, as I was sharing with fellow Nikon shooter Kimothy Pikor. I think she fell in love with this lens. When I could pry it away from her, though, I was impressed with how it handled in a studio setting. Working with modeling lamps it focused just as quickly and accurately. Working with low light coming in from a window was no different, and I was able to capture some great candid shots without using flash.

So, what's this lens good for and is it worth it? I would never use it for an event, as it's focal length is too long for candid photos but too short for capturing most presentations or ceremonies. I'm not sure how it would work at a wedding, either, as it's still in that too long/too short range. But portraits... this is a dream lens for portraits. It's sharp, it's fast, it has flattering compression, it has amazing bokeh. It's on my wish list. It's in my dreams. It will be mine.

As always, I rent my gear from Pro Photo Rental up in Boulder, CO.

Here are some photos from my two days with this lens.  All were shot at f/1.4, with the exception of the detail photo, which was shot at f/9.


Tuesday, February 15, 2011

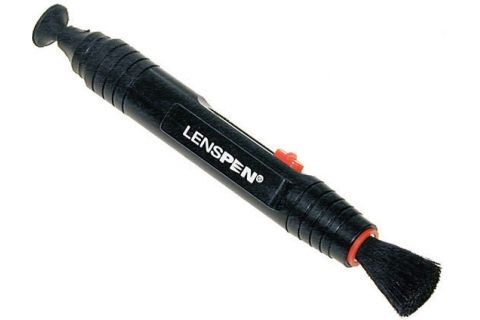
Tech Tuesday - LensPen

I'm going to keep this one short and sweet.  If you don't have a LensPen in your camera bag, you need to correct that situation and order one today!  A LensPen has two sides.  One side is a retractable brush that can be used to brush off any visible dust on your lens.  The other side has a dry cleaning compound on a soft applicator that you rub on your lens to remove smudges.  Between the two different sides, you should be able to quickly clean up any lens in seconds.

Be aware that anytime you touch your lens, you run a slight risk of damaging it.  If something abrasive (like a grain of sand) is on the lens and you rub it around, you're going to damage your lens.  Regular cleaning cloths, like you might use on a pair of glasses, aren't usually recommended for camera lenses.  That's why it's nice to not only have a brush that can brush away any little specks of dirt, but also a surface that's made to be used on camera lenses.  Apparently NASA even uses LensPens!

OK, enough plugging for LensPen.  Happy Tuesday!

Tuesday, January 25, 2011

Tech Tuesdays - Nikon D7000, Deep Thoughts

A few months ago, I wrote a quick review of Nikon's newest DSLR, the D7000.  Since that post, I've done quite a few (25+) shoots and now feel very familiar with the camera. That means I'm ready to dive in and give a more in depth review. Not everything I have to say is positive (but to be honest, most of it is).

First, I want to confirm that all of my initial impressions were pretty much dead on. It still feels great and sounds awesome. To be honest, when I switch back to my D90, it's so loud and clumsy sounding! It always shocks me. The metering is pretty amazing, giving me very accurate exposures. The autofocus is just fantastic and I still rarely experience any lens hunting, regardless of which lens I'm using or what the lighting conditions are like.

So, what else do I have to add? If you're looking for a full, in-depth technical review, you're in the wrong place. There are plenty of great sites out there for that kind of stuff. Instead, I want to offer some more things that I've experienced with the D7000, both positive and negative. Just to make it easy (because I'm lazy and don't feel like writing more paragraphs), here are my thoughts in list form:

First, the things I'm loving...
- When syncing with studio flash (via Pocket Wizard IIs), I'm able to realistically shoot at up to 1/250 of a second (versus 1/160 on my D90).
- Processing the RAW files is a wonderful experience. There's so much more wiggle room in the exposures. I'm not sure if it's because they're 14-bit RAW files, the sensor or just some great Nikon mojo, but noise takes much longer to become an issue when really pushing exposures.
- Shooting from live view mode is very fast and convenient. Compared to the D90, it's like night and day. It's a very small change that doesn't get used very often, but it is SO appreciated when I do need to use it.
- With a maximum shutter speed of 1/8000 of a second and an ISO of 100, I'm able to shoot at very low apertures in full sun. With some very light cloud cover, I could even shoot at f/1.4 at noon in full sun! This will be so useful this summer.
- Shooting at higher ISOs is great! I have no worries shooting at ISO800. Shots that I took at an event at ISO6400 look great! I don't even hesitate to shoot up there if I need to.
- The viewfinder (and the information that's available in it) is so wonderful! It's big and it's bright. If you ever use manual focus, the focus meter is far superior to everything that came before it.
- I don't know how many times I've been saved by the virtual horizon feature. It rocks!
- Battery life is ridiculous. I think the last time I charged it, it had 750 shots since the last charge and still had a charge of around 50%.
- Video looks great and having a stereo mic jack is such a great addition! (FYI, I'll probably be adding a separate post about shooting video)

Now for a few things that are bugging me...
- The dials for adjusting shooting modes, apertures and shutter speeds are too easy to adjust. I appreciate the fact that they're quieter than the D90, but I keep bumping them and changing my shutter speed or aperture!
- Sometimes my 50mm f/1.4 doesn't "bite" when I first put in on the body and won't autofocus. All it takes is a little wiggle and it works just fine from there on out (it never just stops working), but it was pretty annoying until I figured out what was going on.
- My 55mm f/3.5 AI macro lens will not fit onto the body. I have no idea why this is. It's fit all of my previous Nikon bodies. It should fit, but I haven't felt like forcing it, so when I need a macro shot, I pull out my D90.
- I can't figure out how to format both memory cards at once. I'm sure it's some sort of safety feature that won't allow you to, but it's still annoying.
- The photos look a little bit grainier at all ISOs, but I'm sure I just need to work on my noise-reduction settings in Lightroom. Since everything else I've read claims that this sensor has the lowest noise of any DX format sensor on the market, I'm pretty sure it's me, not the camera.
- Skin tones seems to take on a slightly red/pink hue. It's easy enough to fix, and probably varies slightly from camera to camera, but it's still a little annoying.

So, there you have it. These are my thoughts after a few months of using the Nikon D7000. It's an amazing camera and I have no regrets in buying it (even if it was a little impulsive). Has it improved my photography? Not really. Has it made me any better or landed me any more shoots? No. Does it give me more creative options when I'm shooting? A few. Would I recommend it? Without a doubt. Would I buy it again? In a heartbeat. Do I like it? No. I love it!

Here are a few quick samples for you...

This shot was taken with an ISO of 1600 and has virtually no noise.

This was a "let's see how this works" shot that I took at
ISO6400, just to see what it looked like.
And finally, for window-light portraits, I've had the camera parked at
ISO400 and have loved the results.  Here's a self-portrait I did yesterday.
Of course, most of my clients look much better than I do.  :)

Tuesday, January 4, 2011

Tech Tuesdays - Sekonic L-358 Light Meter

There's a fine line between arrogant and ignorant.  Before I got my Sekonic L-358 light meter, I was arrogant.  After I got it, I realized I was just ignorant.  Let me explain...

I could always figure out the proper exposure for a photo with a little trial and error.  Take a picture, check the LCD and histogram, adjust the camera settings, repeat as necessary.  I typically had a good exposure within 3 shots and 10 seconds.  Why would I need a light meter for that?  Well, that was when I was shooting outdoors and had one source of light.  Once I moved into the studio, I started setting up shots with more than one light.  I started dealing with lighting ratios.  Once you start shooting with 3 or 4 lights, you can forget about an easy trial and error approach to lighting.  It's possible, but why bother when you can pick up a light meter and save yourself the headache?

When I first got my Sekonic, I wasn't sure how much I'd actually use it.  I found a good deal and jumped on it, figuring I'd need it sooner or later.  Little did I realize how soon "sooner" would be.  After using it at a few shoots, I knew I'd purchased a very valuable piece of equipment that wouldn't be leaving my camera bag.

Tuesday, December 7, 2010

Tech Tuesdays - 2011 Sneak Preview

So, it looks like 2010 is about to wrap up and it sure is keeping me busy! I'm not sure I'll have time to write up any more gear reviews for Tech Tuesday until 2011, but that doesn't mean I can't tease you with a few of the items you'll get to read about. So, although you'll have to wait a few weeks, here's what you'll be reading about next year:

Lens Reviews - I plan on reviewing all of my lenses and doing some side-by-side comparisons to give you an idea of field of view and bokeh. A few lenses that will get reviewed are my Nikon 50mm f/1.4D, Nikon 12-24mm f/4 and Nikon 135mm f/2 AF-DC (DC stands for defocusing control).

Light Modifier Reviews - Ever wonder what the difference is between a softbox, a beauty dish and a plain reflector? I'll show you the difference, using as many different shapes and sizes as possible.

Nikon D7000 - I posted a sneak preview a few weeks ago, but I'm going to dive in and do a full review of this sweet little camera. Now that I've used it in a variety of shooting conditions, including the studio, I've got a lot more to say about it.

Sekonic L-358 Light Meter - I'm not sure how I haven't reviewed this yet, but I've come to love this light meter. I'll tell you why.

Rode VideoMic - I plan on getting very familiar with this microphone in the near future. I'll let your read, and hear, how it sounds and works with a DSLR recording video.

Yashica-D TLR - Uhhhh, wait a minute. Isn't this supposed to be about technology? About lust-worthy gear that just hit the stores? This camera is almost 50 years old. It shoots film. It's not auto-focus. It doesn't even meter light. Maybe, but it's pretty awesome. I'll tell you why.

There you go! I hope that gets you excited for Tech Tuesday in 2011. Sounds like I'd better get busy!

Tuesday, November 16, 2010

Tech Tuesdays - First Look: Nikon D7000

There are some products that, once they're introduced, rewrite the rules for an entire industry. If you believe the hype, Nikon's new D7000 DSLR might just be one such product. It's been favorably compared to cameras that cost anywhere from twice as much to 4 times as much. No one can keep it in stock and rumors a swirling that, unless you have had one on preorder for a while, it will be months before you can get one.

Imagine my surprise when I decided to dig around a little and found one in my area that was available for sale! Honestly, I believe it was probably the only one available (at retail prices, at least) in the state of Colorado. Someone had a D7000 on hold but hadn't come in to pick it up, so the salesperson took that person's name off of it and put mine on it. I had until the close of business that day to pick it up. I didn't wait.

I got it, brought it home, charged the battery, read the manual, did some research and started playing around with it. So far I've only had a chance to do one shoot with it, but many more are on the horizon. What follows are my first impressions. I'll be sure to follow up with a more in-depth review in the near future.

Note: All comparisons are made to a Nikon D90.

Feel - The first thing I noticed about this camera was the feel of the body. I'm talking about the actual texture of the surface. It feels a bit more sticky, more grippy. I never really felt like I was going to drop my D90, but this camera really feels secure in my hands.

Look - It doesn't really look much different from my D90. There are a few more buttons and an extra dial for the shutter control. The menus and displays all look pretty much the same. Once I had it set up the way I like, it took about, oh, 2 seconds to feel comfortable with it.

Sound - This camera sounds awesome. Or should I say it doesn't sound awesome? It's quiet! The shutter sounds so fast, tight and slightly muffled, I think I'm in love. When you switch it to quiet mode, the shutter just makes the tiniest bit of noise. The first time I tried it I had to make sure I was using it right it was so quiet!

Other thoughts: With just one shoot to go on, I have to say that I'm very impressed.
- Having dual memory card slots was pretty sweet.
- Reviewing photos is a fast and easy experience, as you can scroll up/down, left/right and diagonally, and you can do it quickly!
- Exposures seemed to be dead on when shooting in manual mode and spot metering.
- Focus was pretty good, although I did have a few soft images. I'm going to blame it on the move from a 9-point to a 39-point focusing system. I think I might not be used to such a small focus point, so I was a little careless about being precise with my focus. Regardless, focusing was fast and I don't think I experienced any lens "hunting" in almost 3 hours of shooting with my 50mm f/1.4 AF-D and 135mm f/2 AF DC lenses.
- Did I mention how great this camera sounds?

I haven't really had a chance to test out the D7000's performance at higher ISOs, but everything I've read so far makes me think I'm in for a treat. I also plan on shooting quite a bit of video with it in the next few months. I can't wait to try out the autofocus while shooting some video!

One thing to mention is that in order to process the RAW files, I had to download Adobe Photoshop Lightroom 3.3 RC1. So far I haven't had any issues with it. If you're not running Lightroom and need to process your D7000 RAW files, a quick search should point you in the right direction.

Now, if you'll excuse me, I've got a new camera that's just begging me to use it.

Monday, November 15, 2010

Randomness - The Right Tool For The Right Job

The Right Tool For The Right Job


I've always been a big proponent of using the right tool for the right job. For example, sometimes you can get away with using a hacksaw, which is made for cutting metal, to saw through a piece of wood. It's going to take you longer and make you work harder, but you can do it. If you decide to cut a bunch of wood, though, you're going to be wishing you had the right saw to do it.

Recently, I was reminded of this phrase by not following it. I finally got around to painting our front door. I made a quick check of the supplies I had, figured out what I needed, headed to Home Depot and came home with a gallon of paint. I already had rollers, paint trays, drop cloths... pretty much everything else I needed. Unfortunately, painting a smooth fiberglass door is a lot different from painting a textured wall. The rollers I had gave the door an interesting texture. Unfortunately, we didn't want a textured door, so I grabbed a brush to smooth out the texture. That gave me some nice brush marks. Since I'd already started, I figured I'd finish the first coat and then go get the right tools for the next coat.

A few days later I picked up some foam rollers that are made specifically for doors. They lay down a nice smooth coat of paint, they fit all the little nooks and crannies of the door and they make the job so much easier. As I was painting, I wondered how much easier it would have been to start with one of those rollers. Instead of the 3-4 coats I'm looking at now (to get rid of the brush marks), I could have been done in two.

It's the same with photography. Photographing sports is a lot different from photographing a wedding which is a lot different from creating a portrait. They all need different lenses, different lighting and maybe even different camera bodies. They use different techniques and different skill sets. Who do you think is going to be a more successful football photographer: The person who has a knowledge of football, knows where the action is going to take place and brings just the necessary equipment or the person with the most expensive camera and 10 lenses who doesn't know much about football?

Every time I try something new, I'm painfully reminded of how much practice goes into mastering one particular area of photography. Whether it's sports, food, people or a wedding, every job is different. My toolbox is nowhere near full, which means that from time to time I have to do things the hard way. Just like cutting wood with a hacksaw, I get the job done, but I wouldn't want to do it that way every time. Fortunately, each new job seems to be getting a little easier. Anyone have a door that needs painted?

Tuesday, November 9, 2010

Tech Tuesdays - Lowepro Exchange Messenger Bag

After working a few events where I needed to swap lenses often, I knew something had to change. Here's the situation: You're at an event, you plan on using 3 lenses, your bag is stored someplace that's inaccessible during the event and you're wearing slacks. What do you do? Sounds like you need a bag that's a lot smaller than your camera bag but still holds enough that you don't have to worry about not having something.

When faced with this situation, my first thought was to get a Shootsac. I saw Jasmine Star using one of these while working a wedding and thought it looked like the perfect solution. Unfortunately, I needed one on short notice and couldn't find anyone here in Denver who sold them. Thus began my quest for the non-intrusive-yet-highly-functional bag.

Tuesday, October 26, 2010

Tech Tuesdays - Epson P-3000

I don't know about you, but whenever I finish a shoot and can't immediately upload my photos to my computer for safe storage, I get a little nervous.  It's not like my memory cards are plotting against me and coming up with evil schemes to delete my photos, but you can never be too safe.  I'd always heard great things about the Epson portable storage devices and had wanted to pick one up for a while, but they are pricey and I'd always had better things to spend my money on.

One day I was perusing Craigslist for some great deals on camera gear and found an Epson P-3000 for a great deal.  After confirming that it worked fine and didn't have anything wrong with it, I grabbed some cash, drove over, took a look at it and soon was headed home with a new gadget.  It turns out the guy had purchased it for a trip to Alaska and hadn't touched it since he got back.  He figured he could use the money more than the Epson, so it worked out well for everyone involved!

My first impression of the P-3000 was very good.  The screen is absolutely beautiful.  Navigation is simple and intuitive.  Backup is as easy as clicking one button.  What a wonderful device!

My primary use has been for off-site image backup.  The P-3000 has an 40GB hard drive, so it can easily hold all of my photos from one event.  Heck, it can hold all of my photos from a long vacation!  As soon as I'm done at a shoot, I pull out my memory card, plug it into the top of the P-3000 and a screen pops up that asks if I want to backup the images from the card.  I click yes, put it away and it silently backs up every image.  When I come back, the entire contents of the card are backed up and I can start reviewing files if I want to.  It automatically creates folders for the images, so I can browse past shoots by date.  It builds image previews from RAW files, so I can check images for sharpness if I want to.  Although it can't beat reviewing photos at home on a large monitor, it's a good way to pass the time in a coffee shop.

While browsing files, it's possible to flag photos as picks and only upload those selected photos at a later date, but I haven't messed with those options.  I only use it as a backup.  I still upload the files directly from the memory cards when I get home.  It just makes me feel better to know that they are backed up until I get home.

So, is there anything I would change about the Epson P-3000?  Sure.  I'd love it if it would rotate an image that was taken in portrait orientation if I rotate the viewer.  As it is, all images are only viewable while holding the device in landscape orientation, which means wasted screen space when viewing portraits.  I'd like it if it built previews a little faster.  It's not slow, considering it's building previews from RAW files, but it could be faster.  I love the size, but the first time I held it (before actually buying it), I almost dropped it because I expected the "grips" on the back to be a little bigger.  I realize that by making the back more contoured the entire device gets bigger, but I still feel like I need to wear the wrist strap every time I hold it just so I don't drop it.

In the end, I am very happy with the Epson P-3000.  It has recently been discontinued, but Epson still has a full line of these products available.  If you want a portable backup solution, I highly recommend one of these devices.  Even when I have a laptop with me, the ease and speed having one of these in my camera bag makes it my go-to gadget for backup duty.

Tuesday, September 21, 2010

Tech Tuesdays - Hama Lens Hood

I had been looking for a good Gegenlichtblende for my 50mm f/1.4 for quite a while. Oh, sorry. Don't speak German? Neither do I, but that's what my Hama lens hood is called on the packaging.

So, as I was saying, I had been looking for a lens hood for my 50mm lens for a while. Although I love some good lens flare, there are times you just want to keep the sun off of the lens. Considering this is the lens I use the most and I’m usually shooting outdoors in natural light, a hood would be a good thing to have.

Imagine my surprise when I walk into a camera shop in Victoria, British Columbia of all places and find a whole rack of lens hoods! The shop, Lens and Shutter, had all kinds of goodies, but most were just a little to expensive considering the exchange rate. The Hama hood was only $15, so I figured I’d go for it.

The hood screws into your lens’ filter thread, so you don’t have to worry about compatibility between lens brands. It’s got a collapsible rubber hood that acts as a bumper for your lens when extended or collapsed and takes up very little space when collapsed. I think it’s a brilliant design!

The big question is: Does it work? So far it does! I’ve found situations where the lens might have been hit by some sun without the hood, but with the hood there’s no light on the lens, giving me better color, contrast and saturation. Of course, lens hoods don’t work miracles and I’ve still got to be careful when I’m shooting into the sun or when the sun is right out of frame.

I’ve also found that the hood doesn’t show up in the photos. The packaging says it can be used for lenses with a focal length of 45-55mm, so my 50mm is right in that range. It’s also got an filter ring built in, so it’s still able to accept filters or lens caps.

I don’t think my Hama lens hood has left my lens since I purchased it. At $15, it’s one of the best deals around. It protects my lens, it shields it from glare and it takes up very little room. Once I got home and did a little research, I found out I got a great deal as well. B&H sells their Hama lens hoods for $25 each. I almost saved enough money to pay for an extra meal in Victoria! Almost.

Tuesday, September 14, 2010

Tech Tuesdays - Lastolite TriFlip Bottletop Covers

If you remember reading my post about the Lastolite Tri-Grip, you'll know that I love it. I almost always have it with me. It's awesome for diffusing direct sunlight, providing a large, diffused light source that bathes your subject in a pool of glowing light.

So, what happens when you need a little reflected light instead of diffused light? You buy a reflector. When you go shopping for a reflector, you'll have to decide if you want white, silver, gold, white/silver, gold/silver or black (not really a reflector of light, but still a reflector). That's a lot of options and their cost adds up quickly. What if I told you you could grab them all for the cost of one? Then what if I told you that you you could pick up a set of covers that slips over your beloved Latolite Tri-Grip so you could use it as a reflector? Interested? I bet you are!

Lastolite makes a product called the TriFlip Bottletop Covers. It's a set of two reversible sleeves that fit a TriGrip perfectly. They include all 6 colors I mentioned above (two colors are included twice since there are 8 sides). It's such a simple idea it's kind of ridiculous. Just slightly collapse your Tri-Grip, slide it inside the cover, pop it open and you've got a double-sided reflector instead of a diffuser!

If you're considering purchasing a set of these, let me clear something up. If you look at any description of the TriFlip Bottletop Covers, it says that they fit "regular size (original 33" version) Tri Grips". If you look at the descriptions for Tri-Grip diffusers, you'll see that some say 33" and some say 32", but if you look at the tag that came with your Tri-Grip, it will say 30". Don't worry. For whatever reason, they all seem to be the same thing and the Bottletop Covers will fit. I'm not sure why there is so much inconsistency with the sizing, but they all appear to be the same size in reality.

So the big question is, "How do they work?". One word: Awesome. These things are so amazing! They're very easy to use. They slip on in about 10 seconds. They're very secure and tight. You get all of the benefits of using the Tri-Grip. You have 6 different reflectors at your fingertips (not to mention the diffuser). The best part? The hardly take up any space at all! If you were to carry around 6 different reflectors (especially Tri-Grips), it would take up a lot of room and weight quite a bit! With these, I can actually zip the diffuser and the covers inside the laptop compartment on my backpack and not even notice they are there!

If you've got a Lastolite Tri-Grip diffuser, there is no reason not to pick up a set of the TriFlip Bottletop Covers. They add so much versatility to an already useful tool, it's almost unfair. Now my only problem is that I want to buy another Tri-Grip so I can use both covers at the same time!

Tuesday, September 7, 2010

Tech Tuesdays - Wacom Tablet

Has there ever been something that you've heard everyone talk about, that you've heard nothing but good things about, but for some reason you just don't think you'll like that much? For me, that something was a Wacom Tablet. Everyone says that once you use one to edit photos, you'll never edit without one again. I'd heard that they were so much better than using a mouse. I believed everything I heard, but I didn't think that there was anything wrong with the way I was doing things.

The strange thing about my hesitance towards converting to a Wacom Tablet is that you use a "pen" to work with. It's so much easier to use than a mouse. It's just as natural as using a pen... and I collect pens! I collect fountain pens. For a while, I was completely addicted to improving my handwriting. I practiced every day. I got callouses on my fingers. I had ink stained hands. My collection of pens grew to almost 200. Yet I didn't want to convert my worflow to the use of a pen? Seriously!?

Everything changed once I shot my first wedding. When I was looking at so many photos to retouch, the thought of using a mouse just made my wrist hurt. Plus, Belinda was out of town and I have a reputation for buying things when she's out of town. So, I broke down, did a little research and decided to go with the Wacom Intuos4 Small Tablet. Now I have to say, like everyone else said, since I've used a tablet to edit photos I wouldn't use anything else.

The tablet itself is about the size of a piece of copier paper. The actual surface that you use is much smaller. There are keys and a dial that can be customized to perform just about any action you'd like. The pen has a few switches on the barrel and an "eraser" on the end. Again, these can all be customized to perform any function you'd like them to.

Since I use the tablet for editing photos and nothing else, I haven't had a chance to use all of the cool features it has. It can detect the angle of your pen, so if you're using a chiseled tip brush, it will affect the look of your brush stroke. It's pressure sensitive, so by pressing harder or lighter you can control the flow of your edit. But, I haven't used those, so I can't comment on them. Apparently they're awesome.

One of the first things that threw me for a loop was the fact that the location of the pen on the tablet maps directly to the screen. With a mouse, if I needed to move the mouse across the screen, I might make two small movements with my hand, picking up the mouse between movements, so that the mouse never left a small portion of the mouse pad. With the pen and tablet, the left side of the tablet is the left side of the screen and the right side of the tablet is the right side of the screen. This means that when you want to move from the left to the right side of the screen, the pen has to travel that distance on the tablet. Two short movements doesn't do it!

Once I figured that out, using it quickly became second-nature. I found I had a lot more control when using brushes and editing small things. My wrist didn't get sore after hours of use (although my fingers did get a little tired, like I was writing a long letter). I can imagine, in this digital age, if you can't remember the last time you physicaly used a pen to write anything longer than a signature at the bottom of your Starbucks receipt, it might take a while for your fingers to get used to using the pen.

Another great thing about the tablet is it's very portable. It's currently in my laptop bag, next to my laptop, and doesn't take up any more room than a magazine. I was just using it earlier today to do some editing while I was away from home. Wacom even includes two USB cords so you can keep one at home and take one on the road!

If you've heard the hype before, I'll just say it again. If you've never given a tablet much thought, listen up. Once you use a Wacom Tablet to edit your photos, you will never want to use a mouse again! Now, if only I could cram the guts of the Wacom pen into one of my fountain pens, I'd be a happy camper.

 A quick note on the photo at the top of this post: I thought I had gotten all of the dust off of the tablet.  Apparently I didn't.

Tuesday, August 31, 2010

Tech Tuesdays - Dell Studio XPS 1645 Laptop

Down time is a bad thing, at least from a business standpoint. The less time you have to be productive, the less time you have to be profitable. Before I got a laptop, when Belinda would go to a coffee shop to work and I’d go with her, I’d end up reading my photography magazines. That’s not a bad thing, as I’ve always got plenty that need reading. But that’s not necessarily the best use of my time, especially when I have photos to edit.

The more I thought about it, the more it made sense. I needed a laptop. Then, it was a question of what specs do I need? It came down to a big screen, a powerful processor and a long-lasting battery. I needed something that I could use to edit photos and possibly create short videos. I needed a desktop replacement.

I never thought I’d want a desktop replacement for a laptop. It kind of defeats the function of a laptop if you can’t use it on your lap, doesn’t it? Not really. In today’s age of the coffee shop, a laptop is just a portable computer. A laptop is something you can take with you and work on while you sip a latte. It’s something you can pull out at the airport and catch up on a little work while you wait for an airplane. It’s something that you can use in a hotel room to work while on the road. And when you think about it, all of these places now have work surfaces and even accessible power outlets because laptops have become ubiquitous. No laps required!

Back in my computer geek days, I knew that the XPS line of Dell computers was something that power-users used. So, that’s what I got: a Dell Studio XPS. When I placed my order for my laptop, I knew that I wasn’t going to be getting an ultra-portable laptop. This thing is no netbook. It’s heavy. It’s big. It’s got a bulky battery. But you know what? When it showed up, it wasn’t nearly as big as I was expecting. It’s actually kind of sleek. It’s a good looking piece of technology. Sure, it’s heavy, but it’s also powerful, and that’s a tradeoff that you have to accept.

This laptop is much more powerful than my desktop computer. It’s got a newer processor that has more cores. It’s got more RAM. It’s got the same resolution screen (1080p). It’s got a full-sized, backlit keyboard. It’s pretty darn nice. When I can, I try to use it instead of my desktop to edit photos because it’s faster. There’s less down time. And remember, down time is a bad thing.

So, any negatives? I’ve found a few. Again, it’s big and heavy. When it was time to look for a camera bag that could hold my laptop, I was limited because of the size of the laptop. I even found that my laptop bag options were limited. And talk about heavy… Belinda won’t even lift my camera bag when I have my camera gear and laptop in it at the same time.

What else? For some reason, the keyboard has a strange stutter and random keys will type two letters in a row while I’m typing. The screen is pretty glossy, which can be pretty distracting when there’s a bright light behind me. The processor can get pretty hot while I’m editing photos, which makes the computer hot to the touch and uncomfortable to work on.

In the end, I’m quite happy with my laptop. It does everything I need it to do. It’s fast. The battery is awesome. The screen is beautiful. It’s red and shiny. Now I can be productive anywhere I want, just as long as I can find a table and a power outlet.

Oh, and sorry for the recycled photo. That's just the way things are going today. :)

Tuesday, August 24, 2010

Tech Tuesdays - Camera Bags: Think Tank Streetwalker HardDrive

It's funny what can influence your purchases. You'd think that the reason I buy a new camera bag would be because I had too many lenses or too much gear for my old bag. While that was the case, it wasn't enough to make me go out and buy a new bag. Instead, it took the purchase of a laptop to send me out bag shopping.

My old bag was still working just fine for me. As a matter of fact, I ended up using it more on my recent vacation than I used my new bag, mainly because it forced me to carry less gear which made it lighter to carry around all day. But, once I got a big laptop and needed a way to travel with it and my camera without taking 2 different bags, I knew it was time for a new bag.

Because of the size of the laptop (17" widescreen), I was limited in my selection of camera bags. Most hold a 15" screen, but not many go larger. In addition to the screen, I got the high-capacity battery which makes the laptop thicker than usual. I quickly realized that I needed to start bringing my laptop with me when testing out camera bags.

Since I was going to be using the bag for my camera gear as well, it needed to meet my requirements for that area as well. I needed something that would keep everything organized, allow me to carry just one gear bag to a shoot (meaning I could keep my cables, Pocket Wizards, light meter and lens hoods in it) and had room for growth if needed. It also needed to be sturdy, attractive, comfortable and not cost a small fortune.

Quite a list of requirements, eh? So off I went, laptop in hand, to start testing bags. Some would fit the laptop, but wouldn't hold much gear. Some would hold all my gear but not hold the laptop. Some would hold the gear and laptop but were huge, heavy and expensive. Just when I thought I wouldn't be able to find a bag locally and have to take my chances with an online purchase I found it. I found the Goldilocks bag... it was just right!

Say hello to the Think Tank Streetwalker HardDrive. It pretty much does it all. The laptop fits (just barely... it's that big battery), my gear fits, and it wasn't very expensive. So far I've taken it with me on two out of state trips that included flying and it's been great! So, how about some details?

The inside of the bag can be divided up however you see fit. It's got loads of dividers that all just reposition with velcro. It can hold a pro-level DSLR with a battery grip and 70-200 f/2.8 lens, plus many other lenses and accessories. I don't have that setup, so here's what I've got in it at any given time: My D90 with a 50mm f/1.4 attached, 4-5 Nikon lenses ranging from a 12-24mm f/4 to a 135mm f/2, a SB-600 flash, 2 Pocket Wizards, a light meter, a handful of cords and cables, lens hoods, the power supply for the laptop, the included rain cover and a tub of gum. That's just in the bag part! Inside the lid are a few zippered compartments where I keep spare batteries, memory cards and gels and filters.

The laptop zips into a compartment on the rear of the bag, so it sits under the camera gear and against your back when wearing the bag. On shoots where I don't need the laptop I've been able to zip a collapsible reflector into the laptop compartment. On the front of the bag there are a few zippered pockets where I store pens, business cards, loose change and anything else I need to access in a hurry.

The shoulder straps on the bag are excellent. They're very padded but not too bulky. They have a great shape that really distributes the weight of the bag without digging into my shoulders. The bag also has straps that you can use to distribute the weight of the bag across your chest and waist, although I don't have the waist straps attached (they're removable!). Also included with the bag were straps that can be used to attach a tripod or light stand to the bag, but they're removable as well which really helps keep the external clutter to a minimum.

So how does the bag perform? While the bag is pretty light, when it's fully loaded with all my gear and the laptop it is HEAVY! I'd guess 30 lbs. heavy. That's the downside of bringing all your gear with you. On the plus side, the bag is so well designed it's not uncomfortable to carry when it's fully loaded. On our vacation I chose not to carry it around town and on our hikes, but chose to revert back to my old bag just to save my back. This meant I had a lot less gear with me, but it also meant I didn't dread going out for the day. Accessing my gear is so easy now. The bag design and zippers are just awesome. Really... even the zippers rock!

To say I'm happy with this purchase would be an understatement. I'd always heard good things about Think Tank gear and I can safely say that everything I'd heard is true. It's an amazing bag that will probably see me through a few new camera bodies. I'd recommend it without hesitation to anyone from the serious amature with a few lenses to the seasoned pro with tons of gear. Oh, and anyone with a ginormous laptop who needs a new camera bag.

Tuesday, August 3, 2010

Tech Tuesdays - Sneak Preview

Since I’m busy getting ready for a vacation at the moment, I thought I’d give you a sneak preview of some gear that you can expect to see reviewed in the near future.

- Think Tank Streetwalker HardDrive: This new camera bag has been one of the best investments I’ve made in a while. My old bag was (and still is) great, but this bag takes things to a whole new level. It’s already come with me on one big trip. After I get back from another big trip I’ll really be able to give a full review of what it’s all about. The big question is this: Will I get to review the included rain cover? Hopefully not, but it's there if I need it!

- Lastolite TriFlip Bottletop Covers: What is this? It's simply an amazing product! If you have a Lastolite TriGrip, you need these. They're covers that slip over your TriGrip, turning it into any reflector that Lastolite makes! It's a kit of 7 different materials that hardly takes up any room! It's everything you need when you need it! It really is that cool.

- Pro Show Gold: Need to make a quick slideshow that looks great and includes both photos and video? Want to completely customize a video that shows off your photography? Do you need full control over transitions and the look and feel of your videos? With Pro Show Gold you’ve got all that and more. Maybe I’ll make a video review!

- Dell Studio XPS Laptop: Us photographers are typically pretty mobile (I‘m actually typing this while driving down the interstate… well, my wife is driving). When you’re mobile, a laptop is a great tool to have in your bag. If you plan on doing any kind of photo work like editing on that laptop, it needs to have some power. This laptop’s got power, and a big screen, and a good battery… it’s pretty sweet. It’s also coming with me on vacation, so I’ll get to use it to back up photos on the go!

- Wacom Tablet: How did I ever live without one of these? Now, when I need to do some editing and just have a mouse, it’s like going back to the dark ages. That’s actually how they would have tortured medieval photographers (if photography and computers existed back then). They give you a Wacom tablet, let you get used to it, then take it away and force you to use a mouse. Noooo!!!!

So there you go… a sneak peak of a few pieces of gear that have made my life a little (or a lot) easier. Expect full reviews to start up mid-August. Until then, I’m going to go hike around Seattle and Victoria! Be back soon!

Tuesday, July 27, 2010

Tech Tuesdays - Wedding Photographers: Total Respect

I've always considered myself a reasonable guy when it comes to gear. Sure, there's gear out there that makes me drool and think inappropriate thoughts, but for the most part I'm happy with what I have. I don't ever want something new just because it's new and cool. If I'm going to spend my money on something, it had better fill a gap in my current lineup.

A few weekends ago I shot my first wedding. I had always said that I wasn't going to shoot weddings (at least until I had some experience assisting someone else), but that didn't stop my friend Jill. She insisted that it would be fine and that it was going to be a very laid-back wedding, so no extreme photography was needed. Finally, I agreed to shoot it. Although I walked away with some great experience and wonderful images, I also walked away with a lot more respect for wedding photographers.

I know that since it was my first wedding I was a little overwhelmed, but I was amazed at how quickly things happened! When you're sitting with the rest of the guests watching a wedding it all seems to go pretty smoothly (even a little slow at times). Let me tell you, when you're trying to capture the moments as they happen, things seem to move a lot faster! I almost missed certain moments when I was like, "Oh, flower girls! I'd better get a lot of pictures because they're so cute... click, click, click... hey, you're not a flower girl. You're a bridesmaid! Uh oh." I'm sure after a few weddings you get the flow down, but it probably doesn't get a lot easier, simply because every wedding is just a little different.

So what's this have to do with technology? Like I said at the beginning of this post, I've never wanted gear just because. Sometimes I see the gear that wedding photographers use and think to myself, "That seems like overkill. Do you really need $10,000 worth of gear to shoot a wedding?" After shooting my first wedding, I could confidently say that you might not need it, but it sure would help!

Let me start with the lenses. I use primes with the exception of my 12-24mm wide-angle. They're fast and they're sharp, but there were many times when I really could have used a different focal length but didn't have time to swap lenses. Additionally, they have to be fast zooms. You can't get a zoom as fast as my 135mm/f2, but I think I'd take a 70-200 f/2.8 at a wedding just for the ability to zoom. Same with my 50mm f/1.4... it's probably my favorite lens, and I'd still use it a lot at a wedding, but it would be nice to have a 24-70mm f/2.8 as well. Even my wide 12-24mm f/4 is nice, but the f/2.8 would sure be nicer so I don't get motion blur when people are dancing!

Now let's talk camera bodies. I shoot with a D90 and love it. I rarely get envious of other people's cameras because I know I can get amazing images with my D90 as long as I've got good glass on it. If I started shooting weddings on a regular basis, though, I'd definitely upgrade to a better body. The two big limitations I ran into were low-light autofocusing and ISO performance. With ISO, the D90 is pretty awesome, but I would have loved to have been able to crank it up and get another few stops of light during the reception (which, by the way, was outdoors in Estes Park and was only lit by strings of Christmas lights... probably the most challenging light I could have asked for). It would have also been nice to have a body that autofocuses better in low light. The D90 does a good job, but I found it hunting a little too often once it got completely dark and we were partying in the glow of Christmas lights. Of course, I could have switched to manual focus, but then a bigger viewfinder would have helped quite a bit.

As for all the other gear, I felt pretty good. My flash was great, spare batteries were helpful, lots of fast memory cards kept me shooting and my camera bag... well, there will be a post on that bad boy soon! As long as I keep shooting portraits, I think I'm doing pretty good on gear, but if I get into weddings the credit card will get quite a workout!