Showing posts with label Tech Tuesday. Show all posts

Tuesday, July 12, 2011

Tech Tuesday - Polaroid 230


I am a technology junkie.  I'll admit it.  When I see a new gadget or gizmo that can do something I've never seen before, I'm usually impressed.  What's even more impressive is to see something you've never seen before from a camera that's 40 years old.

My first experience with a Polaroid camera that used pack film was while I was assisting Rachael Grace Photography while she photographed a wedding. Rachael does wedding photography a little differently. In addition to digital, she uses lots of film, including Polaroid pack film.

I had never seen or used Polaroid pack film. My previous experience with Polaroids was limited to my SX-70. I still haven't gotten stellar results from it (although that is kind of the point, I suppose), so my hopes for her Polaroid 420 were not high.

The way pack film works, you take a photo which exposes the film. You then pull the film through some rollers, which spreads a developer over the film. You wait a few minutes, peel off the photo from the exposed film and you have a photo.

When she shot her first photo, she handed it to me to time and then peel. After 2 minutes, I peeled the photo away from the paper with tempered expectations. What I saw when I peeled away that photo just amazed me! It had color and lots of it! The colors were correct! It was actually a good photo!

I knew I had to get one for myself, so I came straight home, tracked one down and before long I was taking photos with my own Polaroid pack film camera. There was a bit of an experimental period and a learning curve. Some photos came out very dark while others came out looking great. Eventually, though, I got it right (or at least pretty close).

I can't wait to start using this camera with some of my clients. It's not entirely predictable and isn't perfect, but that's part of what makes it so fun to use. If you've got one of these and are interested in learning more about the camera, keep an eye out for a follow up blog post where I'll go over a few tricks I've learned that helped me get better photos.

This was taken in full sun in downtown Denver.

Even in the shade with a longer exposure you can get good results.

This was taken with my new Polaroid 350 with a close-up lens attachment.  

Tuesday, June 21, 2011

Tech Tuesday - What's Your Backup Strategy: Part 2

Let's talk data backup strategies.  Not interested?  You should be.  If you read last week's blog post, you should be at least a little worried about backing up your data and developing a strategy to protect it from many different disaster scenarios.  Today I'm going to tell you what my new backup strategy is.  Please, keep in mind that this is what works for me, but it might not be what works for you.  I'm offering this as a starting point so that you can consider if you need more or less protection.

Since I am a photographer, protecting my digital images is a top priority.  I tried to consider a few different scenarios when devising my backup plan.  I think that I came up with a good compromise between safety and sanity.  I'm confident my images will be safe, but I don't have quadruple layers of protection and redundancy (OK, maybe I do, but no more than quadruple!).

Here are a few of the things that I considered and had to work into my backup strategy:
  • Images should be immediately backed up once they are uploaded to my computer.
  • An archive of all of my images should be kept off site.
  • My Lightroom develop settings for every session should be backed up.
  • Final images should be backed up in full-resolution.
So, what did I come up with?  I'll tell you.
  • I'll always have 3 "active" external hard drives.  Two (HD1 and HD2) will be hooked up to my computer.  The third (an exact copy of HD2) will be kept at an off-site location.
  • Once I upload photos to my computer's hard drive, Lightroom automatically makes a backup to HD1.
  • SyncBack SE will continuously monitor my computer's hard drive and will mirror any changes to HD2.
    • As soon as I upload photos to my computer, they exist on three different hard drives (plus the memory cards until I format them)
  • SyncBack will also back up my Lightroom Catalog every day to both HD1 and HD2.
    • That means it will exist on three different hard drives at all times
  • Once I'm done editing photos, I will export the photos as a Lightroom Catalog and burn it to a DVD for archiving.
    • This means I have all of the RAW files plus my edits in one place.  Technically I could put that DVD into any computer with Lightroom installed and it would be no different than editing them on my computer.
  • I'll also export the images as full-resolution JPGs and upload them to my Smug Mug site, where I can download them from anywhere I have internet access.
  • Every week or two I'll swap out HD2 with the copy that's kept at the off-site location and make sure they're both synced.
As you can see, there is a bit of redundancy here, but since most of it is automated, it's not really much of a hassle.  Once I'm done editing a photo shoot, I'll have a copy of the edited photos on my computer's hard drive, two copies on external hard drives, one copy on a DVD and a copy of all edited JPGs in cloud storage.  I think this is going to work!

If you have any questions about what I'm doing or why I did something, feel free to leave a comment and I'll do my best to answer you right away.  I hope this has inspired you to rethink your backup strategy.  Regardless of if your data is professional or personal, you'd better back it up.  If it's not backed up, one of these days it's going to be gone for good.

Tuesday, June 14, 2011

Tech Tuesday - What's Your Backup Strategy: Part 1

We live in a digital world, from the cameras we use to the hard drives we store our photos on.  Unfortunately, digital fails.  We've all heard it before: it's not if your hard drive is going to fail, but when.  What's your backup strategy?

First, let's discuss why you need a backup strategy.  We already know that hardware fails.  What happens if lightning zaps your computer?  How about fire or flood?  Theft?  Virus?  User error?  There are so many different ways you can lose your data it's not even funny.  Then there's the scenario where you don't lose your data, but you can't access it either?  What happens if the hard drive with your operating system dies?  All of your data is safe, you just can't access it.

So now that you have an idea of why you might want to start thinking about a backup strategy, let's talk about what a backup strategy might include.  A successful backup strategy should include all of these features:

  • It constantly backs up your data
  • It's easy to use
  • It's accessible
  • It's redundant.
How about a real-world example?  Let's say you just photographed a wedding.  You import the photos to your computer and they automatically get backed up to an external hard drive.  That was easy.  Now if one hard drive crashes the photos aren't lost.  You spend the next week editing the photos so that they're perfect.  The bride is going to love them!  Oops, your hard drive just crashed.  "No worries!  I have them backed up on this external hard drive!"  Unfortunately, you didn't back up any of your edits, so now you're starting over from scratch.  After another week of editing, you have the photos ready again and all of the edits are backed up to your external hard drive.  Nothing can go wrong now.  Except that your backup is sitting about 2 feet away from your main drive.  You better hope your house doesn't burn down!  Maybe you should move your backup to an offsite location?

I hope that you are at least a little scared by now.  Will your hard drive fail today?  Tomorrow?  Next week?  Probably not.  But it will fail.  You don't know when, which is what makes it extra-scary.

Next week I'll be posting Part 2 of this article, detailing my specific backup strategy.  Until then, I hope you think about your current backup strategy, how well it's working for you and what you want to change.  I am currently re-evaluating my strategy and will be reviewing it from the ground up.  

Keep in mind, I'm a photographer, not an IT guy.  If you don't like my strategy or what I'm saying here, feel free to ignore it or send suggestions my way!  And please... if you're really serious about backing up irreplaceable data, do more research than just reading what I have to say.

Tuesday, May 24, 2011

Tech Tuesday - Photoflex Heavy Duty Backdrop Kit


When I purchased the Photoflex Heavy Duty Backdrop Kit I wasn't sure how much I'd actually use it in my photography.  I figured I'd pull it out once in a while for a few events, maybe a wedding photobooth here and there, but I didn't think I'd use it very often.  As it turns out, I don't use it at every shoot (that would just be ridiculous), but it does get a fair amount of use.  Plus, just knowing that I have it when I need it is great.

So, let's get down to some details.  I'm not going to give you measurements and all that info (which you can find here), but I will give you a quick rundown of what's included.  You get two large stands (that just happen to double as light stands, which is pretty awesome), a collapsible crossbar and a canvas carrying case that everything fits in.  You can fit a few extras in the case if you'd like.  I keep a few spring clips in there so I always have some for my rolls of seamless paper.

In my experience, this is a very sturdy backdrop stand.  I've had the stands extended up to almost their full height and haven't worried about it's stability.  I've also had very drunk people around it and it hasn't so much as wobbled.  OK, maybe it wobbled a bit when they fell through the paper, but that's kind of extreme example.

It's very easy to set up and tear down.  Granted, it's always easier and faster with two people, but I've done it myself many times.  The collapsible crossbar doesn't restrict you to any particular size of backdrop, so I've used both small and large rolls of seamless as well as any variety of fabric backdrops.  Did I mention that both of the support stands can be used as light stands?  When you purchase this you're basically getting two additional tall, sturdy light stands!

Do I have any complaints?  Of course.  One of the reasons this kit is so sturdy is because of it's footprint.  This is not a system that's made for small spaces!  I usually figure I need an additional 2 feet on each side just for the stands, which means that if I'm using a 107" roll of paper, I need a space that's at least 13' wide!

Really, though, that's about it.  I have mostly praise for this kit.  It's easy to transport, easy to setup (especially with help), versatile and sturdy.  It might cost a bit more than some other kits, but it will last and, if you assume you're getting a few extra light stands when you purchase it, is actually really cheap!

This is the moment before the guy fell through the paper... and the backdrop stands survived!
It also works for smaller groups or individual headshots.
Here's a photo from a few weeks ago that shows the stands almost fully extended.
This piece of equipment was huge!
With a little work and my mad Photoshop skillz we had a product photo.


Tuesday, May 17, 2011

Tech Tuesdays - Different Views In Blogger

I know it's been a while since I've written a good Tech Tuesdays post and today isn't really going to change the trend, but I just ran across something that I think is too cool not to share.  It should be useful for any type of blog that you read, photography related or not.

I use Google Chrome and was browsing the different extensions that are available for it when I came across a Blogger extension.  Apparently Blogger has lots of technology under it's hood that's not readily available.  One of the neatest options I found is the ability to change the way you view a blog's content.  It's pretty hard to explain, so I'll just leave it up to you to click through these links and see what I mean.

Flipcard: http://johnbosleyphotography.blogspot.com/view/flipcard
Mosaic: http://johnbosleyphotography.blogspot.com/view/mosaic
Sidebar: http://johnbosleyphotography.blogspot.com/view/sidebar
Snapshot: http://johnbosleyphotography.blogspot.com/view/snapshot
Timeslide: http://johnbosleyphotography.blogspot.com/view/timeslide

Just an FYI, the extension that I was using when I discovered these is called Blogger Dynamic Views.  I'm not sure if it's available for other browsers or not, but it wouldn't hurt to check!  If not, as long as you're viewing a Blogger blog you can just add the "/view/(view you like best)" to the end of the URL to see your favorite blog in a whole new way!

Tuesday, May 10, 2011

Tech Tuesday - Composing for the Crop


We've all been there... We take an amazing image, the client loves it and wants to order a print.  Unfortunately, the size they want to order requires cropping the image.  What to do?  What part of this image do you leave out?    Although you'll never really escape this dilemma, you can minimize how often you're confronted with it by composing for the crop.

It's really just a matter of being familiar with the size of images your camera creates and popular crops that clients might request.  I know that if I want to print an 8x10 image from one of my photos I'll need to crop a fair amount from the top and/or bottom.

After having to make too many hard decisions as to what I'd have to crop (Top of head or hand on hip?  Head or feet?), I decided I'd better start leaving myself some wiggle room.  Now I routinely shoot with some empty top and bottom space in most of my photos.  I still find myself shooting tight at every shoot, but for as many tight photos I get I try to shoot just as many "loose" that can be cropped without losing anything vital.

If it's really that easy to just leave a little extra space around your subjects when you shoot, why not shoot that way all the time?  The primary reason for me is that the closer you get to your subject, the more defocused your background gets.  That extra foot or so of distance between me and my subject can make a huge difference to the look of the background.  Another reason is just habit.  When you get into the habit of creating the image you want to see in the viewfinder, it's really hard to change your style and create an image you wouldn't typically create.

Now, I know what some of you might be thinking: "I'm not going to compromise my artistic integrity by not taking the perfect photo in-camera."  That's fine.  I respect that.  You're going to have to decide whether you want to crop your perfect photos or not sell any prints.

What if you don't want to have to make that decision?  Just display your images digitally where they don't have to be cropped.  Or, sell prints that are sized to accommodate the popular digital formats.  Instead of ordering an 8x10 and cropping, order an 8x12 and don't crop!  The only tough thing about this is finding frames to fit your prints.

In the end, it's up to you to decide how you want to shoot and if you want to change your style or not, but always be aware of the consequences.  There is no perfect solution.  You can frame properly and crop, you can frame loose and have a more defined background, you can not print your images or you can print them in sizes that are harder to frame but don't require cropping.  Good luck!

Here are a few images to illustrate what I'm talking about:

In these images I left enough room for me to crop an 8x10 and still show Lexie's hands and chains.  Notice how much extra background I get in the image.


In these images I composed in-camera pretty much the way I wanted the image to look.  See what happens when I crop for an 8x10?  I lose her hands and chains.


Tuesday, March 29, 2011

Tech Tuesdays: Adventures In Analog

Long ago, when the world had never heard of a megapixel and anything digital belonged in science fiction more than in our daily lives, photography was analog.  Cameras were essentially light-tight boxes.  Photographs were captured on film, not on a memory card.  Prints were made by hand in baths of chemicals in a darkroom.

I've decided to dip my toes into this pre-digital world and see what happens.  I know that I'll never replace my digital equipment with film, but I'd like to be able to use analog processes at appropriate times or for the right projects to, as my wife would say, "add a little glitter" to my work.

My cameras du jour are the Yashica-D and Polaroid SX-70 (you can read my mini-review of it here).  The Yashica shoots medium-format 120 film and I've been playing with color negative film as well as color transparency film.  I've got a few rolls of B&W film that I've yet to shoot.  With the Polaroid, I've only shot a few packs of PX 70 Color Shade Push!, but I can't wait to get my hands on some PX 100 Silver Shade and even some PX 680 Color Shade (all new films made by The Impossible Project).

I'm not going to claim I'm an expert at shooting with these cameras, so expect to see some, how shall I say it... interesting results.  I've already discovered that I can hook up my Pocket Wizards to the Yashica (see the photo above), so I'm really looking forward to shooting some film in the studio.  There's going to be a lot of trial and error, but in this case it's not really about the results as much as it's about the journey.  I hope you'll come on the ride with me!

Tuesday, March 15, 2011

Tech Tuesday - Quick Review: Polaroid SX-70


The Polaroid SX-70 is one of Polaroids more famous cameras.  If you can believe it, it's actually an SLR.  Yes, it's a folding, single-lensed, instant-film SLR.  I've only had mine for a few weeks and in that time have only gotten a few good images with it, so I'm going to hold off on passing judgement and doing a full review until I've spent a little more time getting used to it and really learning how to use it.  For now, I'll just give you my first impressions.

I had been wanting to add a Polaroid to my camera arsenal for a while.  After a little research, the SX-70 sounded like the right camera for me.  Why?  Unlike most Polaroids, it's an SLR, so you get more control over your images.  It also folds up so it's about the size of a VHS tape (a VH...what?), which is pretty awesome.  Not quite pocket-sized, but definitely easy to carry around.

In working condition, these things fetch a pretty penny on eBay, so I decided to try my luck at some antique shops around town.  Actually, I went back to an antique shop where I saw a Rollieflex TLR for sale that I'm still kicking myself for not buying.  When I got there, the Rollie was gone, but I came across this beauty.  It said it worked, so I bought it for a great price.  That same day I ordered my film from The Impossible Project and waited for it to arrive.

The day my film arrived I just couldn't wait to use it, so I popped in a film pack (and the dark slide ejected, which was a good sign), aimed at the nearest object, focused, pressed the big red button and... nothing.  Finally, the photo popped out and it was blank.  I figured it was just bad beginners luck, so I shot another.  This time it felt like the mirror got stuck, which made me panic a little.  It turns out it was just too dark in my house and it was doing like a 10-second exposure.

After putting the camera down and doing a little research (this film wants lots of light), I was able to start getting good exposures and decent photos.  The film is still a little tricky to work with, so I'm definitely in the learning stages, but I see good things in my future with this Polaroid.  I'll keep you updated with my results and will hopefully be able to write a full review sometime in the future.  Also, expect reviews of the different Impossible Project films.

If you want to find out a little more about this camera, here's a great video that Polaroid put out in 1972 to explain how it works:


Tuesday, March 8, 2011

Tech Tuesday - Nikon 85mm f/1.4 AF-S Lens

Wow. Lust-worthy. *Drool*. Right now, words are failing me as I try to describe Nikon's 85mm f/1.4 AF-S lens. I rented it for a photo shoot over the weekend and got to take it out for a day of play in Denver. Here's what happened.

First, let's recap. This is Nikon's newest version of it's legendary 85mm f/1.4 lens, the AF-D. Although I never used the AF-D, I had heard that the AF-S was even more amazing so I couldn't wait to get my hands on it. I rented the lens for a photo shoot on Sunday, which meant it was going to be sitting around all day Saturday. Of course, I couldn't let this happen, so I set up a shoot with fellow photographer Tess Polivka. She rented a Canon lens she had been wanting to try, so we both headed downtown for a day of photography and testing our new toys, I mean lenses.

To really see what this lens could do, I shot the entire day at f/1.4. Normally, I'd hesitate to do this, as most f/1.4 lenses are a little soft when they're wide-open. Not this lens! It's super-sharp at f/1.4. In fact, I was blown away by what I saw when I got home and was able to view the images at full size.

The focus was not only sharp but also accurate! Eyes, not noses, were sharp. At such shallow depth of field, it's very easy to accidentally shift focus from an eye to a nose. I was happy with the number of keepers I had. Not only is focusing accurate, but it's fast and silent also. I'm used to using "D" lenses, which use the body motor to focus the lens. It's a little louder to use, but in most cases it's also faster than the internal "Silent Wave" motors in newer lenses. This lens was indeed silent, but I'm not sure if it could be any faster. Focus seemed almost instantaneous and I never experienced any hunting. Of course, I was outdoors in bright light all day, but that was only Saturday.

On Sunday, I was able to use it at my bridal fashion shoot. Well, I should say I was able to use it a little bit, as I was sharing with fellow Nikon shooter Kimothy Pikor. I think she fell in love with this lens. When I could pry it away from her, though, I was impressed with how it handled in a studio setting. Working with modeling lamps it focused just as quickly and accurately. Working with low light coming in from a window was no different, and I was able to capture some great candid shots without using flash.

So, what's this lens good for and is it worth it? I would never use it for an event, as it's focal length is too long for candid photos but too short for capturing most presentations or ceremonies. I'm not sure how it would work at a wedding, either, as it's still in that too long/too short range. But portraits... this is a dream lens for portraits. It's sharp, it's fast, it has flattering compression, it has amazing bokeh. It's on my wish list. It's in my dreams. It will be mine.

As always, I rent my gear from Pro Photo Rental up in Boulder, CO.

Here are some photos from my two days with this lens.  All were shot at f/1.4, with the exception of the detail photo, which was shot at f/9.


Tuesday, March 1, 2011

Tech Tuesdays - Professional Photographer Magazine


If you've read either of my previous magazine reviews for PDN and Rangefinder, you'll know that I'm a magazine junkie. I just love 'em. In fact, I had to cancel a few subscriptions just so I could read the magazines that I truly loved to read. When I was considering what to keep and what to cut, Professional Photographer Magazine (PPM) barely made the cut.

It's not a bad magazine. Compared to many of the photography magazines you'll find on the newsstand, it's much more pro-oriented. Why then would I consider not renewing my subscription? It's almost too easy to read, especially compared to PDN and Rangefinder, both of which have substantial articles covering a variety of photographic genres. On the other hand, PPM has fairly short articles that don't seem to have quite as much substance to them. It also mainly deals with portraiture and weddings. I've got nothing against portraiture and weddings, as that's pretty much all that I do, but that doesn't mean I don't enjoy reading about something else once in a while.

Another gripe I have with PPM is that, at times, it can seem like one big advertisement for the Professional Photographers of America (PPA). The PPM is a publication of the PPA, so that's no surprise, but it still bugs me. From promoting PPA services and classes to upcoming PPA events, it's easy to go from being intrigued to being turned off.

In the end, I renewed my subscription to PPM. Why? It's a great magazine! It has great articles about running a photography business. It has beautiful pictures, which are always a great source of inspiration. And, as I mentioned, it's pretty easy to read. When I don't feel like diving into a new issue of PDN or Rangefinder, I know that I can always pick up my PPM and just sit back and read. The biggest deciding factor was that it's not available for sale at newsstands. I know that most magazines that I don't subscribe to can easily be purchased if I want a particular issue. With this one, that's not an option.

For $20 a year, I think PPM is a pretty good value. While it might not be my favorite photography magazine around, it's definitely one that I enjoy reading. At the end of the day, there's nothing wrong with reading something you find enjoyable (and hopefully learning something or getting some inspiration while you're at it!).

Tuesday, February 22, 2011

Tech Tuesday - Craigslist


Camera gear is expensive. That's not big news. You can find anything on the internet. That's not big news either. Combine camera gear with the internet, add a dash of patience and you've got some great deals just waiting to happen. And where, you might ask, is this magical land where these deals come together? A little place called Craigslist.

If you've never used Craigslist, it's essentially online classified ads that are free to use. Anyone can list anything they want to sell in the hopes that someone who wants to buy that thing will see the ad. The transactions occur on a local level, which makes it easy to view and test products before purchasing them. Plus, there's no shipping involved, so it's usually cheaper than eBay.

Does it seem a little risky to buy used camera gear? It might be. If you need absolute reliability from your gear, it's probably worth it to spend the extra money to buy it new. If cash is a little tight, though, and you come across a good deal on a piece of gear that you've had your eye on, this might be a great opportunity to pick it up and save some money!

I've worked checking Craigslist into my daily routine. It takes about 2 minutes to scan the listings for Denver, Fort Collins and Colorado Springs and see what's been listed recently. I've found some great deals on lenses, studio lighting, camera batteries and even photography books! I've seen some really good deals on camera bags, backgrounds, light stands and many other miscellaneous camera accessories. When you find that deal, you've got to act quickly! If you don't send an email about an item as soon as you see it, you're already too late. It's pretty competitive out there.

Is Craigslist for everyone? No. Some people prefer to buy items new. Some people would rather buy used equipment from a camera shop instead of an individual. If you're willing to put in a little time, have some patience and take a risk here and there, Craigslist can hold hidden treasure for those of use who know where to look.

Tuesday, February 15, 2011

Tech Tuesdays: Part II - Facebook Business Page Notifications


As a business owner with a Facebook page, it has been frustrating to not know when a fan comments on your page. Facebook just released a new business page layout that gives you the option to receive email notifications when a fan posts something on your page. This is nice, but it's not exactly what we've been looking for.

Another new option for Facebook Page users is the ability to use Facebook as your Page. This means that instead of leaving a comment as "John Bosley", I can comment as "John Bosley Photography". I decided to try this out and, to my surprise, discovered something pretty awesome. When you use Facebook as your page, you get notifications when someone posts on your Page! As you can see in the screenshot above, the first time you use this feature might be a little surprising, as you have a Friend Request for every fan of your page. You'll probably also have a bunch of notifications from previous fan comments. Once you get over the initial shock and zero these out, you'll actually be able to get notified when someone interacts with your page! Of course, you'll have to be using Facebook as your page, but it's so easy to switch back and forth, you can do it anytime you visit your page.

So, without commenting on some of the other changes to Facebook pages (what's up with the chronological order, or lack thereof?), this is one change that I'm really going to like!

While you're at it, why don't you head on over to my Facebook Page and become a fan?

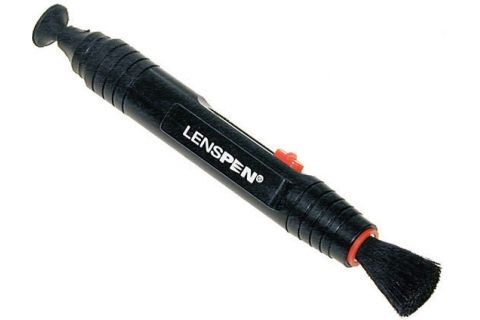
Tech Tuesday - LensPen

I'm going to keep this one short and sweet.  If you don't have a LensPen in your camera bag, you need to correct that situation and order one today!  A LensPen has two sides.  One side is a retractable brush that can be used to brush off any visible dust on your lens.  The other side has a dry cleaning compound on a soft applicator that you rub on your lens to remove smudges.  Between the two different sides, you should be able to quickly clean up any lens in seconds.

Be aware that anytime you touch your lens, you run a slight risk of damaging it.  If something abrasive (like a grain of sand) is on the lens and you rub it around, you're going to damage your lens.  Regular cleaning cloths, like you might use on a pair of glasses, aren't usually recommended for camera lenses.  That's why it's nice to not only have a brush that can brush away any little specks of dirt, but also a surface that's made to be used on camera lenses.  Apparently NASA even uses LensPens!

OK, enough plugging for LensPen.  Happy Tuesday!

Tuesday, February 8, 2011

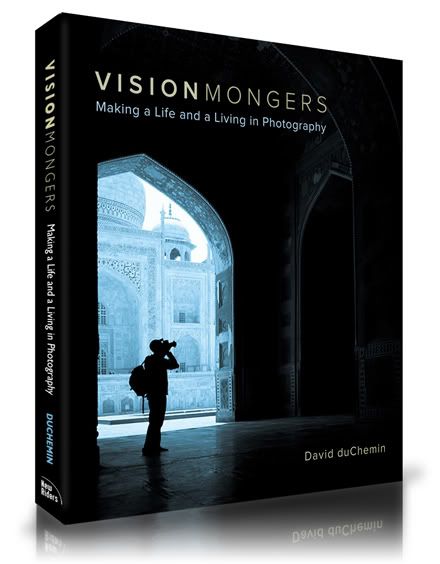
Tech Tuesdays - Book Review - "Vision Mongers: Making A Life And A Living In Photography"

OK, here's the situation... you've got a passion for photography and want to turn it into a career. Or maybe you've already taken the plunge and are working full-time as a photographer, but you're not sure if you're doing things the right way. Or maybe you've been working as a photographer for a while and things are going pretty well, but you still have unanswered questions or nagging doubts in the back of your mind. If any of these sound like you, you need to read this book!

In Vision Mongers: Making A Life And A Living In Photography, author David duChemin tells us his story, and the story of many other successful photographers, in order to make a point. His point is that there is no magic bullet, there is no secret, there is no shortcut to becoming a successful photographer. Instead, he gives us tips and tricks that he has learned through his own journey.

Although this might be considered a textbook of sorts, it doesn't read like one. DuChemin's voice and writing style are easy enough to read for hours on end. Whether he's talking about marketing or pricing, his words are engaging, informative and entertaining.

To me, his words just make sense. There were many different times while I was reading this book that I realized he was saying something that I'd thought or felt before, but had never really taken the time to conceptualize. It felt good to read these things that I'd had a vague notion of in the past, but finally had some affirmation from someone who knows a lot more about photography than me. Of course, it's always nice when someone agrees with you, but this was more than that. This was more like a whisper in my ear saying that I'm on the right track, that I'm headed in the right direction and if I keep moving, I'll keep getting closer to my goals.

Vision Mongers isn't just a feel-good book and it's not just another business book. It's a book written by a photographer for photographers. It's going to be an essential part of my library (and maybe even my business) and I look forward to reading it many more times in the future. If you want to start making money with your photography, do yourself a favor and get this book. There are no guarantees that you'll make it, but reading this book sure can't hurt!

Oh, and by the way, if you've had that Fresh Prince song stuck in your head since the first sentence of this post... you're welcome!

Tuesday, January 25, 2011

Tech Tuesdays - Nikon D7000, Deep Thoughts

A few months ago, I wrote a quick review of Nikon's newest DSLR, the D7000.  Since that post, I've done quite a few (25+) shoots and now feel very familiar with the camera. That means I'm ready to dive in and give a more in depth review. Not everything I have to say is positive (but to be honest, most of it is).

First, I want to confirm that all of my initial impressions were pretty much dead on. It still feels great and sounds awesome. To be honest, when I switch back to my D90, it's so loud and clumsy sounding! It always shocks me. The metering is pretty amazing, giving me very accurate exposures. The autofocus is just fantastic and I still rarely experience any lens hunting, regardless of which lens I'm using or what the lighting conditions are like.

So, what else do I have to add? If you're looking for a full, in-depth technical review, you're in the wrong place. There are plenty of great sites out there for that kind of stuff. Instead, I want to offer some more things that I've experienced with the D7000, both positive and negative. Just to make it easy (because I'm lazy and don't feel like writing more paragraphs), here are my thoughts in list form:

First, the things I'm loving...
- When syncing with studio flash (via Pocket Wizard IIs), I'm able to realistically shoot at up to 1/250 of a second (versus 1/160 on my D90).
- Processing the RAW files is a wonderful experience. There's so much more wiggle room in the exposures. I'm not sure if it's because they're 14-bit RAW files, the sensor or just some great Nikon mojo, but noise takes much longer to become an issue when really pushing exposures.
- Shooting from live view mode is very fast and convenient. Compared to the D90, it's like night and day. It's a very small change that doesn't get used very often, but it is SO appreciated when I do need to use it.
- With a maximum shutter speed of 1/8000 of a second and an ISO of 100, I'm able to shoot at very low apertures in full sun. With some very light cloud cover, I could even shoot at f/1.4 at noon in full sun! This will be so useful this summer.
- Shooting at higher ISOs is great! I have no worries shooting at ISO800. Shots that I took at an event at ISO6400 look great! I don't even hesitate to shoot up there if I need to.
- The viewfinder (and the information that's available in it) is so wonderful! It's big and it's bright. If you ever use manual focus, the focus meter is far superior to everything that came before it.
- I don't know how many times I've been saved by the virtual horizon feature. It rocks!
- Battery life is ridiculous. I think the last time I charged it, it had 750 shots since the last charge and still had a charge of around 50%.
- Video looks great and having a stereo mic jack is such a great addition! (FYI, I'll probably be adding a separate post about shooting video)

Now for a few things that are bugging me...
- The dials for adjusting shooting modes, apertures and shutter speeds are too easy to adjust. I appreciate the fact that they're quieter than the D90, but I keep bumping them and changing my shutter speed or aperture!
- Sometimes my 50mm f/1.4 doesn't "bite" when I first put in on the body and won't autofocus. All it takes is a little wiggle and it works just fine from there on out (it never just stops working), but it was pretty annoying until I figured out what was going on.
- My 55mm f/3.5 AI macro lens will not fit onto the body. I have no idea why this is. It's fit all of my previous Nikon bodies. It should fit, but I haven't felt like forcing it, so when I need a macro shot, I pull out my D90.
- I can't figure out how to format both memory cards at once. I'm sure it's some sort of safety feature that won't allow you to, but it's still annoying.
- The photos look a little bit grainier at all ISOs, but I'm sure I just need to work on my noise-reduction settings in Lightroom. Since everything else I've read claims that this sensor has the lowest noise of any DX format sensor on the market, I'm pretty sure it's me, not the camera.
- Skin tones seems to take on a slightly red/pink hue. It's easy enough to fix, and probably varies slightly from camera to camera, but it's still a little annoying.

So, there you have it. These are my thoughts after a few months of using the Nikon D7000. It's an amazing camera and I have no regrets in buying it (even if it was a little impulsive). Has it improved my photography? Not really. Has it made me any better or landed me any more shoots? No. Does it give me more creative options when I'm shooting? A few. Would I recommend it? Without a doubt. Would I buy it again? In a heartbeat. Do I like it? No. I love it!

Here are a few quick samples for you...

This shot was taken with an ISO of 1600 and has virtually no noise.

This was a "let's see how this works" shot that I took at
ISO6400, just to see what it looked like.
And finally, for window-light portraits, I've had the camera parked at
ISO400 and have loved the results.  Here's a self-portrait I did yesterday.
Of course, most of my clients look much better than I do.  :)

Tuesday, January 4, 2011

Tech Tuesdays - Sekonic L-358 Light Meter

There's a fine line between arrogant and ignorant.  Before I got my Sekonic L-358 light meter, I was arrogant.  After I got it, I realized I was just ignorant.  Let me explain...

I could always figure out the proper exposure for a photo with a little trial and error.  Take a picture, check the LCD and histogram, adjust the camera settings, repeat as necessary.  I typically had a good exposure within 3 shots and 10 seconds.  Why would I need a light meter for that?  Well, that was when I was shooting outdoors and had one source of light.  Once I moved into the studio, I started setting up shots with more than one light.  I started dealing with lighting ratios.  Once you start shooting with 3 or 4 lights, you can forget about an easy trial and error approach to lighting.  It's possible, but why bother when you can pick up a light meter and save yourself the headache?

When I first got my Sekonic, I wasn't sure how much I'd actually use it.  I found a good deal and jumped on it, figuring I'd need it sooner or later.  Little did I realize how soon "sooner" would be.  After using it at a few shoots, I knew I'd purchased a very valuable piece of equipment that wouldn't be leaving my camera bag.

Tuesday, December 7, 2010

Tech Tuesdays - 2011 Sneak Preview

So, it looks like 2010 is about to wrap up and it sure is keeping me busy! I'm not sure I'll have time to write up any more gear reviews for Tech Tuesday until 2011, but that doesn't mean I can't tease you with a few of the items you'll get to read about. So, although you'll have to wait a few weeks, here's what you'll be reading about next year:

Lens Reviews - I plan on reviewing all of my lenses and doing some side-by-side comparisons to give you an idea of field of view and bokeh. A few lenses that will get reviewed are my Nikon 50mm f/1.4D, Nikon 12-24mm f/4 and Nikon 135mm f/2 AF-DC (DC stands for defocusing control).

Light Modifier Reviews - Ever wonder what the difference is between a softbox, a beauty dish and a plain reflector? I'll show you the difference, using as many different shapes and sizes as possible.

Nikon D7000 - I posted a sneak preview a few weeks ago, but I'm going to dive in and do a full review of this sweet little camera. Now that I've used it in a variety of shooting conditions, including the studio, I've got a lot more to say about it.

Sekonic L-358 Light Meter - I'm not sure how I haven't reviewed this yet, but I've come to love this light meter. I'll tell you why.

Rode VideoMic - I plan on getting very familiar with this microphone in the near future. I'll let your read, and hear, how it sounds and works with a DSLR recording video.

Yashica-D TLR - Uhhhh, wait a minute. Isn't this supposed to be about technology? About lust-worthy gear that just hit the stores? This camera is almost 50 years old. It shoots film. It's not auto-focus. It doesn't even meter light. Maybe, but it's pretty awesome. I'll tell you why.

There you go! I hope that gets you excited for Tech Tuesday in 2011. Sounds like I'd better get busy!

Tuesday, November 23, 2010

Tech Tuesdays - ProDPI

It was a cold, rainy night. I was going to an event down in Englewood. My brother was in town from Boston and was borrowing my truck, so he dropped me off at the event. Unfortunately, due to our schedules not quite meshing, I was about 45 minutes early to the event. Since the weather was kind of miserable, I didn't really feel like hanging around outside, so I asked if I could come inside and wait. The answer was a friendly "Yes", and that was my first contact with ProDPI.

I was shown back to the area where the party was going to take place. One of the customer service reps was just leaving and she told me that I could sit at her desk if I wanted. How nice of her! After sitting for a while, a woman came into the room with her young boy. It turns out she was Caitlin, the CEO of ProDPI. We chatted while she fed her son and I couldn't have asked for a nicer person to talk to while I waited. I learned that the guy who I met when I walked in was Jeffrey, her husband and COO of ProDPI.

When Caitlin had to run off to take care of something, I took the opportunity to look around at the samples or their work that they had on display for the party. I should mention that ProDPI is a full service, pro lab. They offer everything from prints to albums, business cards to stickers. Every sample that I looked at, including albums, accordion books and mounted prints all looked amazing!

Once the party was underway and more people showed up, Jeffrey took us on a tour of the ProDPI facilities. He explained their print process, their philosophy and why they relocated from California to Colorado. He showed us their lab, their prep area and their packing facilities. Their commitment to being a green company shows in their use of shipping materials (cardboard made with post consumer waste), recycling of all recyclable materials, eco-friendly print packaging options and electronic invoicing. By the end of the tour I was thoroughly impressed.

The next day I decided to create an account with ProDPI and order some test prints. No matter how impressive a lab is in person, it doesn't mean much if their actual prints aren't any good. I downloaded their ROES software and, after a few minutes, had ordered my prints. I really wanted to get the prints ordered before noon, as I had another test for ProDPI. I wanted to see if I ordered my prints before noon if they'd be at my house the next day. I'm happy to say that they were waiting for me when I came home the next evening! I know this might not happen every time, but just knowing that it can happen is awesome.

So, let's do a quick recap. Friendly staff, family-owned, great quality press products, good selection, eco-friendly and fast! Sounds good so far, but what about those prints? I'm happy to say that they are better than I had expected! The actual quality of the print is outstanding. I have a standard test image that I print with every lab I've ever tried and ProDPI is at the top of the list. Their print showed more detail than most and the colors were excellent! What really makes their prints stand out, though, is their paper. Jeffrey mentioned that they are one of the few labs in the country who use Fuji paper and I must admit, I like it a lot better than the Kodak paper that I'm used to. It's a little heavier, so it feels more substantial, and it has a more appealing texture as well.

In case you didn't figure it out by now, I now have a new lab. ProDPI does amazing work and I'd suggest checking them out if you're a photographer. Not only are they awesome for all of the reasons I mentioned above, but their prices are very competitive with other national pro labs. If you're in Denver, they are a local business and I'll take almost any opportunity to support local businesses. Welcome to Colorado, ProDPI. I'm glad we met!

Tuesday, November 16, 2010

Tech Tuesdays - First Look: Nikon D7000

There are some products that, once they're introduced, rewrite the rules for an entire industry. If you believe the hype, Nikon's new D7000 DSLR might just be one such product. It's been favorably compared to cameras that cost anywhere from twice as much to 4 times as much. No one can keep it in stock and rumors a swirling that, unless you have had one on preorder for a while, it will be months before you can get one.

Imagine my surprise when I decided to dig around a little and found one in my area that was available for sale! Honestly, I believe it was probably the only one available (at retail prices, at least) in the state of Colorado. Someone had a D7000 on hold but hadn't come in to pick it up, so the salesperson took that person's name off of it and put mine on it. I had until the close of business that day to pick it up. I didn't wait.

I got it, brought it home, charged the battery, read the manual, did some research and started playing around with it. So far I've only had a chance to do one shoot with it, but many more are on the horizon. What follows are my first impressions. I'll be sure to follow up with a more in-depth review in the near future.

Note: All comparisons are made to a Nikon D90.

Feel - The first thing I noticed about this camera was the feel of the body. I'm talking about the actual texture of the surface. It feels a bit more sticky, more grippy. I never really felt like I was going to drop my D90, but this camera really feels secure in my hands.

Look - It doesn't really look much different from my D90. There are a few more buttons and an extra dial for the shutter control. The menus and displays all look pretty much the same. Once I had it set up the way I like, it took about, oh, 2 seconds to feel comfortable with it.

Sound - This camera sounds awesome. Or should I say it doesn't sound awesome? It's quiet! The shutter sounds so fast, tight and slightly muffled, I think I'm in love. When you switch it to quiet mode, the shutter just makes the tiniest bit of noise. The first time I tried it I had to make sure I was using it right it was so quiet!

Other thoughts: With just one shoot to go on, I have to say that I'm very impressed.
- Having dual memory card slots was pretty sweet.
- Reviewing photos is a fast and easy experience, as you can scroll up/down, left/right and diagonally, and you can do it quickly!
- Exposures seemed to be dead on when shooting in manual mode and spot metering.
- Focus was pretty good, although I did have a few soft images. I'm going to blame it on the move from a 9-point to a 39-point focusing system. I think I might not be used to such a small focus point, so I was a little careless about being precise with my focus. Regardless, focusing was fast and I don't think I experienced any lens "hunting" in almost 3 hours of shooting with my 50mm f/1.4 AF-D and 135mm f/2 AF DC lenses.
- Did I mention how great this camera sounds?

I haven't really had a chance to test out the D7000's performance at higher ISOs, but everything I've read so far makes me think I'm in for a treat. I also plan on shooting quite a bit of video with it in the next few months. I can't wait to try out the autofocus while shooting some video!

One thing to mention is that in order to process the RAW files, I had to download Adobe Photoshop Lightroom 3.3 RC1. So far I haven't had any issues with it. If you're not running Lightroom and need to process your D7000 RAW files, a quick search should point you in the right direction.

Now, if you'll excuse me, I've got a new camera that's just begging me to use it.

Tuesday, November 9, 2010

Tech Tuesdays - Lowepro Exchange Messenger Bag

After working a few events where I needed to swap lenses often, I knew something had to change. Here's the situation: You're at an event, you plan on using 3 lenses, your bag is stored someplace that's inaccessible during the event and you're wearing slacks. What do you do? Sounds like you need a bag that's a lot smaller than your camera bag but still holds enough that you don't have to worry about not having something.

When faced with this situation, my first thought was to get a Shootsac. I saw Jasmine Star using one of these while working a wedding and thought it looked like the perfect solution. Unfortunately, I needed one on short notice and couldn't find anyone here in Denver who sold them. Thus began my quest for the non-intrusive-yet-highly-functional bag.