Tuesday, January 25, 2011

Tech Tuesdays - Nikon D7000, Deep Thoughts

A few months ago, I wrote a quick review of Nikon's newest DSLR, the D7000.  Since that post, I've done quite a few (25+) shoots and now feel very familiar with the camera. That means I'm ready to dive in and give a more in depth review. Not everything I have to say is positive (but to be honest, most of it is).

First, I want to confirm that all of my initial impressions were pretty much dead on. It still feels great and sounds awesome. To be honest, when I switch back to my D90, it's so loud and clumsy sounding! It always shocks me. The metering is pretty amazing, giving me very accurate exposures. The autofocus is just fantastic and I still rarely experience any lens hunting, regardless of which lens I'm using or what the lighting conditions are like.

So, what else do I have to add? If you're looking for a full, in-depth technical review, you're in the wrong place. There are plenty of great sites out there for that kind of stuff. Instead, I want to offer some more things that I've experienced with the D7000, both positive and negative. Just to make it easy (because I'm lazy and don't feel like writing more paragraphs), here are my thoughts in list form:

First, the things I'm loving...
- When syncing with studio flash (via Pocket Wizard IIs), I'm able to realistically shoot at up to 1/250 of a second (versus 1/160 on my D90).
- Processing the RAW files is a wonderful experience. There's so much more wiggle room in the exposures. I'm not sure if it's because they're 14-bit RAW files, the sensor or just some great Nikon mojo, but noise takes much longer to become an issue when really pushing exposures.
- Shooting from live view mode is very fast and convenient. Compared to the D90, it's like night and day. It's a very small change that doesn't get used very often, but it is SO appreciated when I do need to use it.
- With a maximum shutter speed of 1/8000 of a second and an ISO of 100, I'm able to shoot at very low apertures in full sun. With some very light cloud cover, I could even shoot at f/1.4 at noon in full sun! This will be so useful this summer.
- Shooting at higher ISOs is great! I have no worries shooting at ISO800. Shots that I took at an event at ISO6400 look great! I don't even hesitate to shoot up there if I need to.
- The viewfinder (and the information that's available in it) is so wonderful! It's big and it's bright. If you ever use manual focus, the focus meter is far superior to everything that came before it.
- I don't know how many times I've been saved by the virtual horizon feature. It rocks!
- Battery life is ridiculous. I think the last time I charged it, it had 750 shots since the last charge and still had a charge of around 50%.
- Video looks great and having a stereo mic jack is such a great addition! (FYI, I'll probably be adding a separate post about shooting video)

Now for a few things that are bugging me...
- The dials for adjusting shooting modes, apertures and shutter speeds are too easy to adjust. I appreciate the fact that they're quieter than the D90, but I keep bumping them and changing my shutter speed or aperture!
- Sometimes my 50mm f/1.4 doesn't "bite" when I first put in on the body and won't autofocus. All it takes is a little wiggle and it works just fine from there on out (it never just stops working), but it was pretty annoying until I figured out what was going on.
- My 55mm f/3.5 AI macro lens will not fit onto the body. I have no idea why this is. It's fit all of my previous Nikon bodies. It should fit, but I haven't felt like forcing it, so when I need a macro shot, I pull out my D90.
- I can't figure out how to format both memory cards at once. I'm sure it's some sort of safety feature that won't allow you to, but it's still annoying.
- The photos look a little bit grainier at all ISOs, but I'm sure I just need to work on my noise-reduction settings in Lightroom. Since everything else I've read claims that this sensor has the lowest noise of any DX format sensor on the market, I'm pretty sure it's me, not the camera.
- Skin tones seems to take on a slightly red/pink hue. It's easy enough to fix, and probably varies slightly from camera to camera, but it's still a little annoying.

So, there you have it. These are my thoughts after a few months of using the Nikon D7000. It's an amazing camera and I have no regrets in buying it (even if it was a little impulsive). Has it improved my photography? Not really. Has it made me any better or landed me any more shoots? No. Does it give me more creative options when I'm shooting? A few. Would I recommend it? Without a doubt. Would I buy it again? In a heartbeat. Do I like it? No. I love it!

Here are a few quick samples for you...

This shot was taken with an ISO of 1600 and has virtually no noise.

This was a "let's see how this works" shot that I took at
ISO6400, just to see what it looked like.
And finally, for window-light portraits, I've had the camera parked at
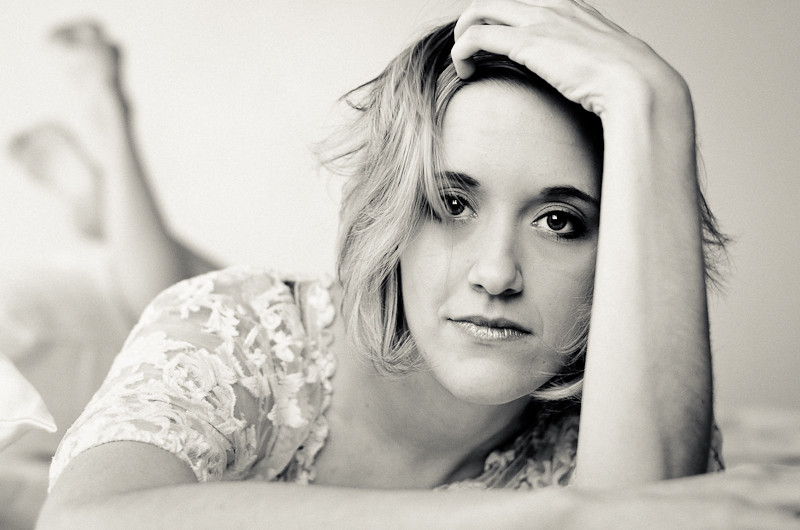
ISO400 and have loved the results.  Here's a self-portrait I did yesterday.
Of course, most of my clients look much better than I do.  :)

Friday, January 21, 2011

F-Stops - Better Photos... Now!


If you're new to DSLR photography, you're probably familiar with shutter speeds. The shutter stays open for a certain amount of time, which allows a certain amount of light to enter the camera. You might not be quite as familiar with the concept of apertures and f-stops.

A lens aperture is the opening in your lens that the light passes through. An f-stop is a way of measuring the size of that opening. The bigger the opening, the more light that enters the camera. This part makes sense, right? Here's where things get a little confusing with the terminology. The larger the aperture (bigger hole), the smaller the f-stop number. The smaller the aperture (smaller hole), the larger the f-stop number. For example, f/1.4 is a very big aperture (big hole), while f/32 is a very small aperture (small hole). Although it might be a little counter-intuitive, it's just the way it is.

So why would you want to adjust the amount of light coming into your camera? Why not just change the shutter speed? Changing the f-stop can drastically change the look of your photos. Have you ever seen a photo where the subject is in focus but the background is blurry? That was probably taken with a lens with a large aperture. This kind of image is just not possible with a small aperture. At the opposite extreme, almost any landscape image you've seen where the flowers in the foreground are just as in focus as the mountains in the background was probably taken with a very small aperture. This is just one reason to use different apertures in different situations.

Another reason to use different apertures is to allow in more or less light. If you're shooting in low light conditions, the ability to open up your aperture and allow in a lot of light, while still using a reasonable shutter speed, might mean the difference between getting the shot and not getting the shot. At the other extreme, if you're shooting in full sunlight, you might want to use a very small aperture and allow a lot less light to enter your camera.

Aperture and shutter speed are directly related. An increase in shutter speed (faster shutter=less light) can be offset by an increase in aperture size (bigger opening=more light). A decrease in shutter speed (slower shutter=more light) can be offset by a smaller aperture (smaller opening=less light).

To wrap up this discussion, let me list a few situations where you might want to use different f-stops:

Large aperture (f/1.4, f/2.8, f/4) - Low light conditions, isolate subject from background, artistic blurring effect.
Small aperture (f/11, f/16, f/32) - Bright light conditions, keep everything in focus, landscapes.

Be aware that shooting at your lens' extreme apertures typically will somewhat degrade image quality. If you're shooting at f/1.4, all of your image will appear a little "soft", meaning that even the point of focus will not be as sharp as if you'd shot it at, say, f/5.6. Also, if you shoot at f/32, you'll encounter more diffraction, which will lead to a decrease in image quality. This doesn't mean you shouldn't use these extreme apertures, but only that you should be aware of these potential effects.

You should always experiment with your lenses to see what effect different f-stops have at different focal lengths. For example, f/4 will look a lot different on a 12mm lens than it will on a 200mm lens. Once you're familiar shooting with your different lenses at different f-stops, you can start to create the images you want to see.

Here are a few examples to illustrate this last point:


This image was shot at f/4 with a 12mm lens.  Notice how everything is pretty well focused.
I shot this at f/4 because that's as wide as this lens would open and it was getting dark.

This image was shot at f/4 with a 50mm lens.  Notice how the background retains some detail but isn't very focused.
I wanted to make sure all of the family members were in focus, but everything else was out of focus.

This image was shot at f/4 with a 135mm lens.  Notice how the background has gone completely out of focus.
Even the grooms glasses are starting to go out of focus.

Read all of my DSLR tips here.

Thursday, January 20, 2011

A Bridal Soiree: An Evening of Love and Glamour

Last Friday I was fortunate enough to have the opportunity to photograph my first bridal fashion show (or any fashion show for that matter). I teamed up with some wonderful local vendors to photograph An Evening of Love and Glamour at Kevin Taylor's at the Opera House. The event was put on by Flawless, Timeless and Blue. Here are a few thoughts on the event...

There were quite a few different vendors at the event, but only a few were participating in the fashion show. I was brought on specifically to photograph the first portion of the show, which consisted of ECO-Bridal Gowns, NM Designs and Boutique de Bijoux. Andrea with ECO-Bridal had the vision for how her gowns should be displayed on the runway and kept everything rolling along during the hours leading up to the show. Natalee with NM Designs provided all of the headpieces and veils and made sure that they were all paired with the correct dresses. She also made sure that all of the dresses fit the models and provided last-minute alterations as needed. Katharine with Boutique de Bijoux paired all of her beautiful jewelry with the appropriate gowns and also staffed the vendor table for these three vendors so that potential customers had a friendly person to talk to. Hair was taken care of by Trouble Salon and last-minute make up duties were done by Cherry Creek Divas. I can't leave out Phil Peralta with Simply Entertainment for DJ-ing the event and keeping everyone entertained throughout the evening.

After hours of preparation and hard work, the fashion show was over in a matter of minutes. Everyone who was involved in the show did a great job and the models, gowns, veils and jewelry looked beautiful! I'm proud to have been a part of such a great production and look forward to working with some of the wonderful people I met at this event again in the near future.


Friday, January 14, 2011

Lens Filters - Better Photos... Now!

You've probably heard it from almost everyone you've talked to: You'd better put a filter on your lens to protect it. If you're going to spend hundreds, even thousands of dollars on a lens, doesn't it make sense to do everything you can to protect that precious piece of glass? It depends.

The most popular filters to use on a lens are skylight or UV filters. These are both essentially clear filters that, unlike a polarizing or colored filter, don't really affect the properties of the light that enters the lens. The appeal of these filters is that they provide an extra layer of protection between your lens and any dust, dirt or fingerprints that could damage your lens and affect your photos.

Unfortunately, most people (myself included) don't buy a high-quality filter for that expensive lens. Instead, we get decide to save some money and buy the cheap filter. Granted, the cheap filters might only cost $30-$50, while a high-quality filter might cost $200-$300. That's a lot of money to spend on a filter. Compared to a new lens, though, it might be a very good investment.

So why should you spend the money on a good filter? Maybe it's easier to let you know why you shouldn't buy a cheap filter. For the majority of situations you encounter, it won't really matter if you have a cheap filter on your lens. Sure, if you want to get really picky, it might degrade your image quality a bit. Lenses are, after all, built to very strict standards with very high-quality glass and sticking a cheap piece of clear glass in front of a lens isn't going to make your image any better. Ultimately, though, for the average photographer (or client) it's not going change the image quality enough to matter.

There are certain situations where it does matter. For example, when you're shooting a subject and there are defined light sources behind her, you might experience green "ghosts" in your image. When this happens, it's almost impossible to get rid of these after the fact. Making matters worse, it's very difficult to even notice them while you're shooting, so unless you're really scrutinizing your photos as you take them, you might not notice you've ruined your photos until it's too late. High-quality filters are designed so that they don't ghost and will not ruin your photos.

What can you do if you don't want to spend a few hundred dollars on a filter but don't want to risk damage to your lens? First, if you have a lens hood, it should always be on your lens. This will help protect your lens from the majority of bumps you might encounter that could damage your lens (or at least the front element). Second, if you must use a filter, be aware of the kind of situations that could cause problems and remove the filter if you encounter such a situation. It's better to have it on 95% of the time than not at all, right? Some people (myself included) have just decided to go filterless. If you always use a hood and regularly clean your lenses, you shouldn't encounter any issues. Of course, there's always a risk that your lens will be damaged, but that's a risk you have to be willing to take if you decide to not use a filter.

Ultimately, you need to do what makes the most sense to you. Do you regularly take photos of motocross or in the Sahara desert? You'll probably want a little extra protection for your lens. Do the most extreme situations you encounter involve a baby spitting up? You're probably pretty safe shooting without a filter. Of course, you need to decide what your comfort levels and needs are, but with a little thought and common sense, you should be able to reach a compromise between image quality and lens protection.

Here are a few of the images where I first realized how much a cheap filter could ruin a shot.  Keep in mind, I haven't used a filter on my lenses for quite a while, so I had to go pretty far back to find some images that worked as examples.  Also, these aren't necessarily the best shots from this event, just the best examples of ghosting.  :)

Notice the ghosts from the windows on the children.
Again, you can see the window's ghost on the guy's arm.

This is a very bad ghost.  It's coming from the door behind the crowd.
You can actually see the trees that were outside!
For more on this subject, hop on over to this excellent article by Thom Hogan.

Read all of my DSLR tips here.

Wednesday, January 12, 2011

The Math Of A Model Shoot


When I shoot with models, it's almost always for fun. It's to try something new, to push myself creatively, to try to do something that I haven't done before. It's to collaborate with someone else and see what we can create. It's to spend a few hours indulging in taking photos of someone who loves to be in front of the camera, for no other reason than because it's what we both love to do.

As with any photo shoot, though, we still want to come away with good photos. This takes a connection between the model and myself. Some might call it a level of comfort, some might call it chemistry... all I know is that if we connect during a shoot, the results can be surprising. Heck, sometimes we click before we ever meet. I often know if I'm really going to get along with someone by the messages we send back and forth while setting up a shoot.

I was just thinking about how everything adds up with a model shoot. I always shoot TF, which means "Time For". This used to be TFP, or "Time For Print", but now instead of prints, it's just a CD of images. Essentially, we're trading services, which is a nice way to say we're both doing it for free.

So if no money is changing hands, it must be pretty simple, right? Just show up and shoot? Not exactly. To start, we probably spend an hour over the course of a week messaging each other to set everything up. We decide on a look and feel for the shoot, even a theme if we can. It takes time to find images to use as inspiration and even more time to figure out how to light the set. Then there's the set, which requires decorating, which requires props that may or may not need purchasing.

Once it's time for the shoot, there's setting up the set and the lighting, then shooting, then tearing down the set and cleaning the studio. Then it's time to upload the photos, select which photos to process and finally, the actual photo processing and retouching. I let the model know the photos are ready, upload them and, if everything looks good, burn them to a CD and drop it in the mail.

When all is said and done, this free shoot has taken anywhere from 6-10 hours, cost between $25-$75 (for props and studio time) and hasn't really given me anything that I can use in my portrait portfolio. What did I receive in return? Let's see... I got to have a great time with a beautiful person. I got to indulge in taking photos for a few hours. I got to try something new that I wouldn't have tried with a paying client. Most importantly, I got some great images.

Not to sound too negative, but it's not that hard to get a great image of a model. As a photographer, if you know what you're doing, just taking photos of beautiful people will get you some great images. Out of the 50 great images I might get from a model shoot, maybe 10 of those will be very good images. Out of those 10, maybe 3 are something new that I'd consider adding to my portfolio. If I'm really lucky and we really connected during the shoot, one of those 3 photos might just be something special, a captured moment that can't be re-created, a photo that happened on it's own, not because we tried to make it happen.

It's this one photo that I'm always trying to capture. It's this one photo that, when I see it, my breath catches. It's this one photo that makes it all worth while. Regardless of the time, or the cost, or the flakes or the flops, it's this one photo that keeps me coming back for more.

Tuesday, January 4, 2011

Tech Tuesdays - Sekonic L-358 Light Meter

There's a fine line between arrogant and ignorant.  Before I got my Sekonic L-358 light meter, I was arrogant.  After I got it, I realized I was just ignorant.  Let me explain...

I could always figure out the proper exposure for a photo with a little trial and error.  Take a picture, check the LCD and histogram, adjust the camera settings, repeat as necessary.  I typically had a good exposure within 3 shots and 10 seconds.  Why would I need a light meter for that?  Well, that was when I was shooting outdoors and had one source of light.  Once I moved into the studio, I started setting up shots with more than one light.  I started dealing with lighting ratios.  Once you start shooting with 3 or 4 lights, you can forget about an easy trial and error approach to lighting.  It's possible, but why bother when you can pick up a light meter and save yourself the headache?

When I first got my Sekonic, I wasn't sure how much I'd actually use it.  I found a good deal and jumped on it, figuring I'd need it sooner or later.  Little did I realize how soon "sooner" would be.  After using it at a few shoots, I knew I'd purchased a very valuable piece of equipment that wouldn't be leaving my camera bag.

Monday, January 3, 2011

2011 Resolutions

Last year I made some resolutions.  This year I am going to do the same.  Let's take a look at last year's and see how I did...


- Stop apologizing for my camera. I did a pretty good job with this one.  I think my photos speak for themselves and most people don't really care what kind of camera they came from.

- Get organized. Hmmm... this is a little iffy.  I didn't get super organized, but at least I have systems that work for me.  There's always room for improvement, though, so consider this an ongoing project.

- Learn to "read" photos for lighting. I think I did OK with this one.  I didn't really push myself very hard, but I didn't really have a need to.  Fortunately I was busy enough to not have the free time to do this.

- Grow and maintain my network. I didn't really start working on this one until later in the year, but it's definitely grown since last year.  Success!

- Get out and shoot more!  I didn't really get out that much, at least not for personal work.  Once my 365 was done, I didn't have very many reasons to head out for photos.


This year I'm going to change things up a bit and get more serious.  Here are my 2011 resolutions: